
Baked Crunchy Honey Chicken

Golden, crunchy baked chicken pieces glazed in a sticky-sweet honey soy sauce — all the flavor of fried chicken with less oil and a lot of family-friendly appeal.
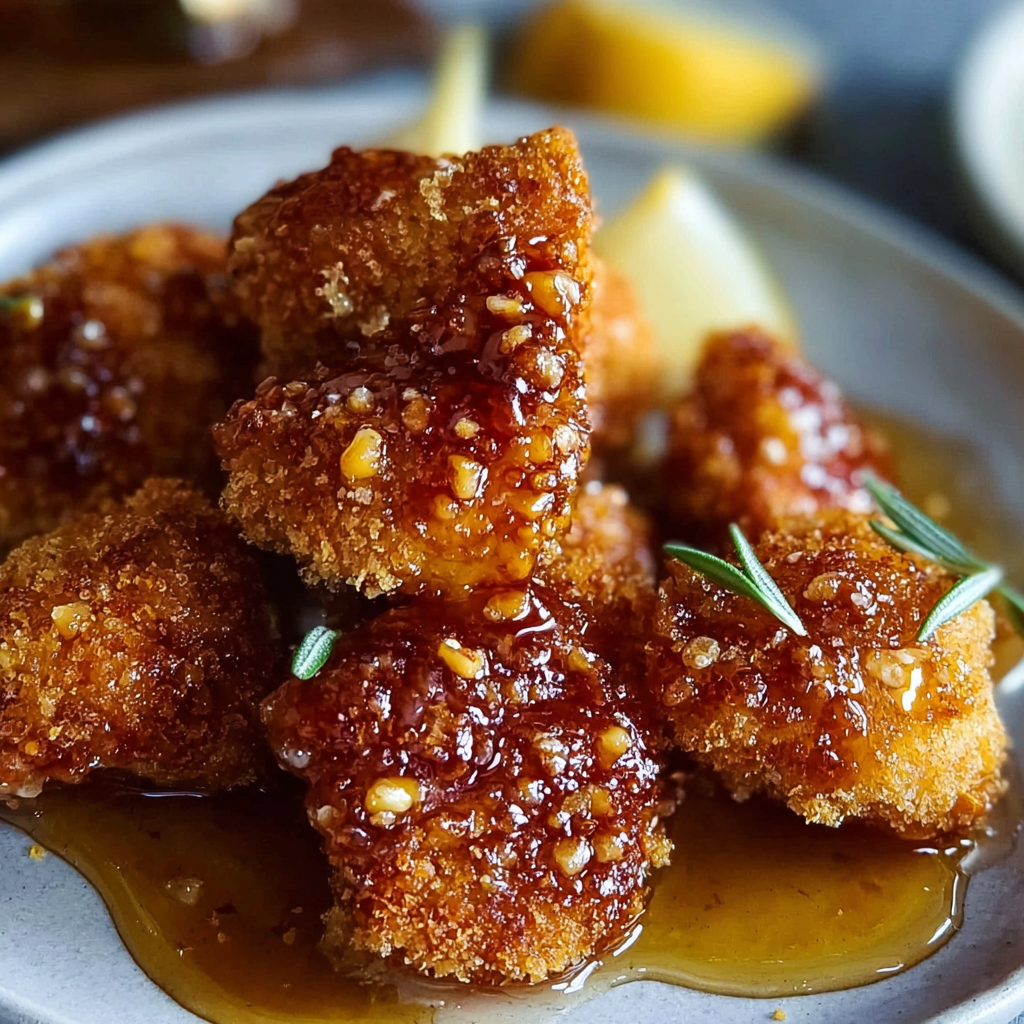
This Baked Crunchy Honey Chicken has quietly become the kind of dish I reach for when I want something that tastes indulgent but doesn’t require frying. I first put this combination together on a busy weeknight when I had a single pound and a half of boneless skinless chicken thighs in the fridge and a jar of honey I wanted to use. The result was unexpectedly perfect: the exterior turned golden and crunchy thanks to panko crumbs, while the simple honey-soy glaze added a glossy, slightly savory finish that kept everyone at the table dipping their forks back into the pan. It’s the sort of thing that makes weekday dinners feel celebratory without much fuss.
What I love most about this version is the texture contrast — a crisp coating and tender, juicy dark meat inside — and how forgiving the method is. The recipe plays well with pantry staples: flour, eggs, panko, and a couple of spices. The glaze is literally honey and soy sauce warmed together, but the timing matters; applied at the end it sets into a sticky shell rather than making the breading soggy. That simple technique is what turned a last-minute idea into a lasting favorite for friends and family.
Why You'll Love This Recipe
- Easy weeknight preparation that yields crunchy results without deep frying — ready in about 45 minutes from start to finish and uses pantry staples.
- Kid-friendly and adult-pleasing: mildly sweet glaze balanced with a hint of savory soy and seasoned panko for texture and flavor.
- Make-ahead friendly: bread the pieces and store them in the fridge for a few hours or freeze raw coated pieces for later baking.
- Flexible ingredient swaps: use gluten-free crumbs, swap honey for maple or a reduced-sugar glaze for lighter sweetness.
- Perfect for gatherings: bite-sized pieces are ideal for serving on a platter with dipping sauces or as an easy main over rice or greens.
- Healthier approach to a crispy dish — less oil and a cleaner finish while keeping the crunch that makes it irresistible.
I remember the first time I served this to a group: my sister declared it "dangerously addictive," and our neighbor asked for the recipe before dessert. Over time I refined the timing and the glaze application — baking first, finishing with a short re-bake after glazing — to preserve the crisp crust. That small change made a big difference and is now my go-to method whenever I want crunchy, sticky chicken without the fryer.
Ingredients
- Chicken: 1 1/2 pounds boneless, skinless chicken thighs, trimmed and cut into bite-sized pieces. Thighs stay juicier than breast when baked; buy fresh or thawed for best texture.
- All-purpose flour: 1 cup to build the first layer of coating; it helps the egg adhere and creates a light base under the crumbs. Spoon and level the cup for accurate measuring.
- Eggs: 2 large, beaten. Eggs provide the glue that holds the panko in place — use large eggs at room temperature for even coating.
- Breadcrumbs (panko preferred): 1 cup. Panko gives the signature extra crunch; choose Japanese-style panko (brand examples: Kikkoman panko or 365 by Whole Foods) or use coarse domestic breadcrumbs if necessary.
- Honey: 1/2 cup. Use a mild floral honey so it doesn’t overpower the soy; clover or wildflower work well.
- Soy sauce: 2 tablespoons. Light or regular soy provides savory balance; for low-sodium use a reduced-sodium soy sauce and taste the glaze.
- Spices: 1 teaspoon garlic powder, 1 teaspoon onion powder, 1 teaspoon paprika — these seasonings are mixed into the flour for consistent flavor in every bite.
- Salt & pepper: 1/2 teaspoon salt and 1/2 teaspoon black pepper. Adjust if you use a salty soy sauce.
- Cooking spray or oil: For greasing the sheet and giving the crumb an extra boost of crispness; a light mist of neutral oil or an oil brush is ideal.
Instructions
Preheat and prepare: Set the oven to 400°F (200°C). Line a rimmed baking sheet with parchment paper for easy cleanup and even browning. If you have a wire rack that fits the sheet, place it on top of the parchment and grease the rack lightly; elevating the pieces crisps all sides. Allow the oven to fully reach temperature before baking. Cut and dry the chicken: Pat the chicken pieces completely dry with paper towels — moisture is the enemy of crunch. Cut thighs into uniform bite-sized pieces, roughly 1 to 1 1/2 inches, so they cook evenly. Trim excess fat for a leaner finish if you prefer. Set up the breading station: Arrange three shallow bowls: in bowl one, whisk the flour with salt, pepper, garlic powder, onion powder, and paprika. In bowl two, beat the eggs. In bowl three, place the panko breadcrumbs. Working one piece at a time, dredge in flour, shake off excess, dip into egg, then press into panko until fully coated. For extra adhesion, press crumbs gently into the chicken. Arrange and bake: Place coated pieces on the prepared sheet or rack, leaving space between them. Lightly spray the tops with cooking spray to promote browning. Bake for 20–25 minutes, checking for an internal temperature reading of 165°F (75°C) in the thickest piece. The crust should be golden and crisp. Make the honey glaze: While the chicken bakes, combine 1/2 cup honey and 2 tablespoons soy sauce in a small saucepan over low heat. Stir gently until the mixture is warm and homogenous — avoid boiling. Heat for 1–2 minutes just to loosen the honey and marry the flavors, then remove from heat. Glaze and finish: Once the chicken reaches 165°F, remove the tray and drizzle or brush the glaze evenly over each piece. Return to the oven for an additional 5–8 minutes to set the glaze; this step caramelizes the surface slightly without making the crust soggy. Allow the tray to rest five minutes before serving so the glaze firms up.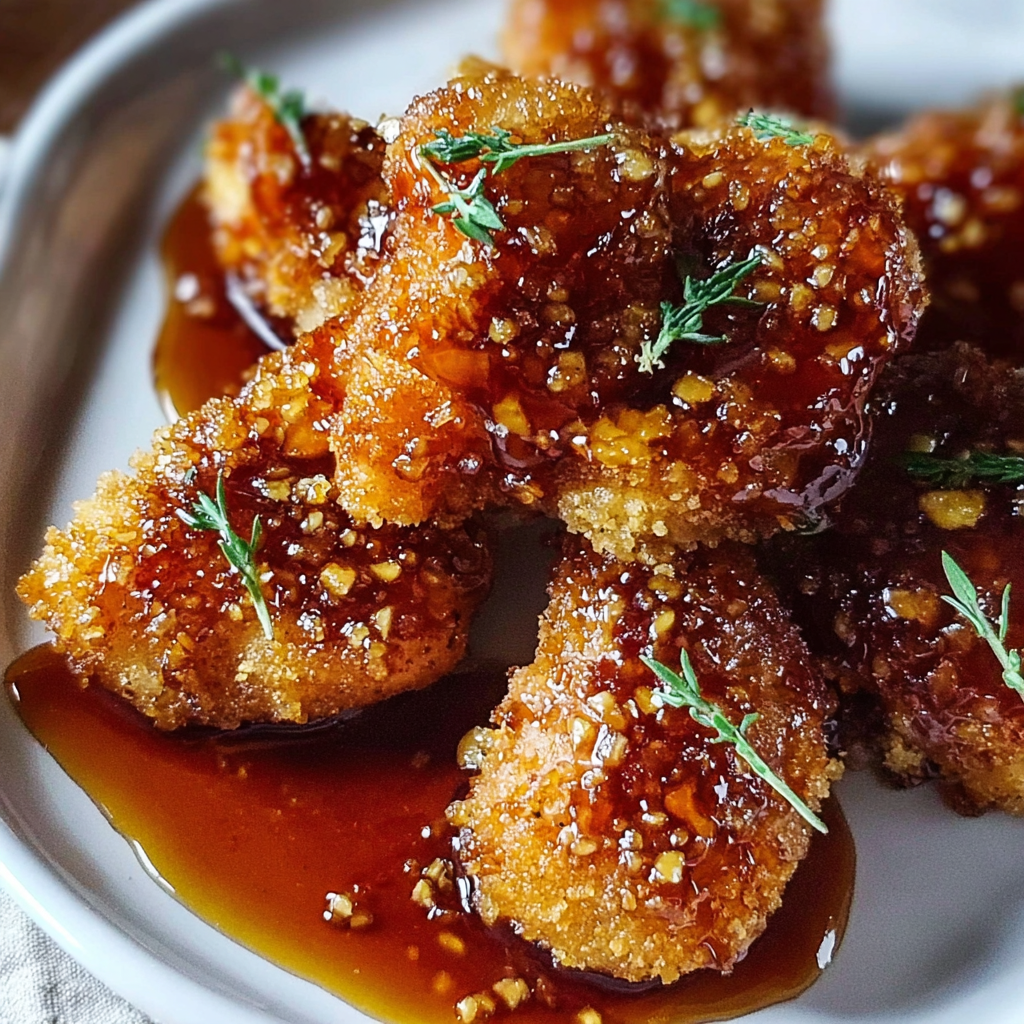
You Must Know
- The internal temperature must reach 165°F (75°C) — use an instant-read thermometer for accuracy rather than judging by color alone.
- Applying the glaze near the end preserves crunch: too early and the topping will make the crumbs soggy.
- This holds well in the refrigerator for up to 4 days; reheat in a 350°F (175°C) oven for 8–10 minutes to refresh the crust.
- Freeze raw coated pieces on a tray, then transfer to a bag for up to 3 months; bake from frozen, adding about 10–12 minutes to the time and checking temperature carefully.
My favorite part is how the glaze clings to the nooks of the panko, creating sticky little crescents of sweet and savory with each bite. In our household it quickly replaced takeout chicken for busy nights because it delivers both texture and comfort — plus it’s easy to scale up for guests.

Storage Tips
Cool pieces to room temperature (no more than two hours), then store in an airtight container in the refrigerator for up to four days. To keep the crust crisp, separate layers with parchment and avoid airtight lids that trap steam when food is warm. For longer storage, freeze raw, breaded pieces on a tray until solid, then transfer to a freezer bag for up to three months. Reheat refrigerated portions in a 350°F oven for 8–12 minutes; frozen portions bake at 400°F for 30–35 minutes from frozen, but always check the internal temperature.
Ingredient Substitutions
If you need to avoid gluten, substitute the 1 cup all-purpose flour with a 1:1 gluten-free flour blend and replace panko with gluten-free breadcrumbs or crushed rice cereal for texture. For an egg-free option, use a commercial egg replacer or a combination of 1/2 cup plain yogurt (if not vegan) or aquafaba (chickpea brine) to help the crumbs adhere. Swap honey for maple syrup or a reduced-sugar golden syrup for a slightly different flavor profile — remember the glaze will be thinner with maple, so simmer slightly longer to thicken.
Serving Suggestions
Serve over steamed white rice or jasmine to absorb the honey-soy juices, or pair with a crisp green salad dressed in a tangy vinaigrette to cut through the sweetness. For appetizers, place on a platter with toothpicks and offer extra glaze, spicy mayo, or a soy-ginger dipping sauce. Garnish with sliced green onions and toasted sesame seeds for color and nutty contrast. It also pairs nicely with roasted vegetables or a simple cucumber salad for a balanced plate.
Cultural Background
While not a traditional dish from any single cuisine, this preparation draws on pan-Asian flavor cues — particularly the combination of honey and soy — merged with Western breadcrumb techniques. It’s an example of how global pantry ingredients come together: panko (a Japanese-style breadcrumb) for crispness, soy for umami, and honey for sweetness. Variations of sweet-and-savory glazed chicken appear in many home kitchens worldwide, each region adapting the glaze and coating to local preferences.
Seasonal Adaptations
In cooler months, add warming spices like a pinch of five-spice powder or a teaspoon of grated ginger to the glaze for complexity. In summer, lighten the meal with a citrus-honey glaze (add 1 tablespoon lime juice and zest) and serve with a chilled slaw. Holiday adaptations can include substituting dark honey or adding a touch of orange marmalade to the glaze for festive brightness. These small changes shift the character of the dish without altering the core technique.
Meal Prep Tips
For grab-and-go lunches, bake a double batch and portion into airtight containers with rice and steamed broccoli. The chicken reheats well in a toaster oven to restore crunch. Alternatively, fully bread raw pieces and freeze them on a tray; on the day of serving, bake directly from frozen for convenience. Label frozen packs with the bake time and desired temperature to simplify future reheating. Keep glaze separate until serving if you prefer to preserve the crunch longer.
This dish is one of those reliable crowd-pleasers that blends ease and technique. Whether you’re cooking for a rushed weeknight or a casual gathering, the method delivers dependable texture and comforting flavor that invites improvisation. Make it your own by adjusting the spice or swapping sweeteners, but keep the final glaze step — it’s the trick that transforms simple baked pieces into something memorably sticky and crunchy.
Pro Tips
Pat the chicken dry before breading — removing surface moisture is key to a crunchy crust.
Lightly spray the top of the breaded pieces with oil before baking to encourage even browning without deep frying.
Apply the honey glaze near the end of baking and return to the oven briefly so the glaze sets without making the crumbs soggy.
Use an instant-read thermometer to ensure each piece reaches 165°F (75°C) for safe, juicy chicken.
This nourishing baked crunchy honey chicken recipe is sure to be a staple in your kitchen. Enjoy every moist, high protein slice — it is perfect for breakfast or as a wholesome snack any time.
Tags
Baked Crunchy Honey Chicken
This Baked Crunchy Honey Chicken recipe makes perfectly juicy, tender, and flavorful steak every time! Serve with potatoes and a side salad for an unforgettable dinner in under 30 minutes.
Ingredients
Main
Instructions
Preheat and prepare
Preheat oven to 400°F (200°C). Line a rimmed baking sheet with parchment; if using a wire rack, place it on the sheet and grease lightly. Allow the oven to reach full temperature before baking.
Cut and dry the chicken
Pat chicken pieces dry with paper towels and cut into uniform 1 to 1 1/2-inch pieces for even cooking. Trim excess fat for a cleaner finish.
Set up the breading station
Arrange three bowls: seasoned flour (flour mixed with salt, pepper, garlic powder, onion powder, paprika), beaten eggs, and panko breadcrumbs. Dredge each piece in flour, dip into egg, then coat thoroughly in breadcrumbs, pressing crumbs to adhere.
Arrange and bake
Place coated pieces spaced on the prepared sheet or rack. Lightly spray with cooking spray. Bake for 20–25 minutes until golden and an instant-read thermometer registers 165°F (75°C).
Make the honey glaze
Combine 1/2 cup honey and 2 tablespoons soy sauce in a small saucepan over low heat. Warm and stir until smooth and slightly loosened; do not boil. Remove from heat once blended.
Glaze and finish
Brush or drizzle the warm glaze over baked pieces and return to the oven for 5–8 minutes to set the glaze without sogginess. Let rest 3–5 minutes before serving so the glaze firms.
Last Step: Please leave a rating and comment letting us know how you liked this recipe! This helps our business to thrive and continue providing free, high-quality recipes for you.
Nutrition
Did You Make This?
Leave a comment & rating below or tag
@aiolirecipe on social media!
Categories:
You might also like...

Fall Harvest Pasta Salad
A cozy, colorful salad that celebrates autumn flavors — roasted butternut squash and Brussels sprouts tossed with pasta, cranberries, pecans, and tangy feta, finished with a balsamic vinaigrette.

Cilantro Lime Steak Bowls
Bright, tangy cilantro-lime marinated flank steak served over rice with black beans, corn, fresh veggies and creamy avocado for a fast, healthy weeknight bowl.

Pecan Pie Crescent Rolls
Buttery crescent rolls filled with a sweet pecan pie–inspired filling — a quick, crowd-pleasing dessert perfect for holidays or weeknight cravings.
Did You Make This?
Leave a comment & rating below or tag @aiolirecipe on social media!
Rate This Recipe
Share This Recipe
Enjoyed this recipe? Share it with friends and family, and don't forget to leave a review!
Comments (1)
This recipe looks amazing! Can't wait to try it.
Comments are stored locally in your browser. Server comments are displayed alongside your local comments.
Hi, I'm Olivia!
What's Popular

30-Minute Meals!
Join to receive our email series which contains a round-up of some of our quick and easy family favorite recipes.