
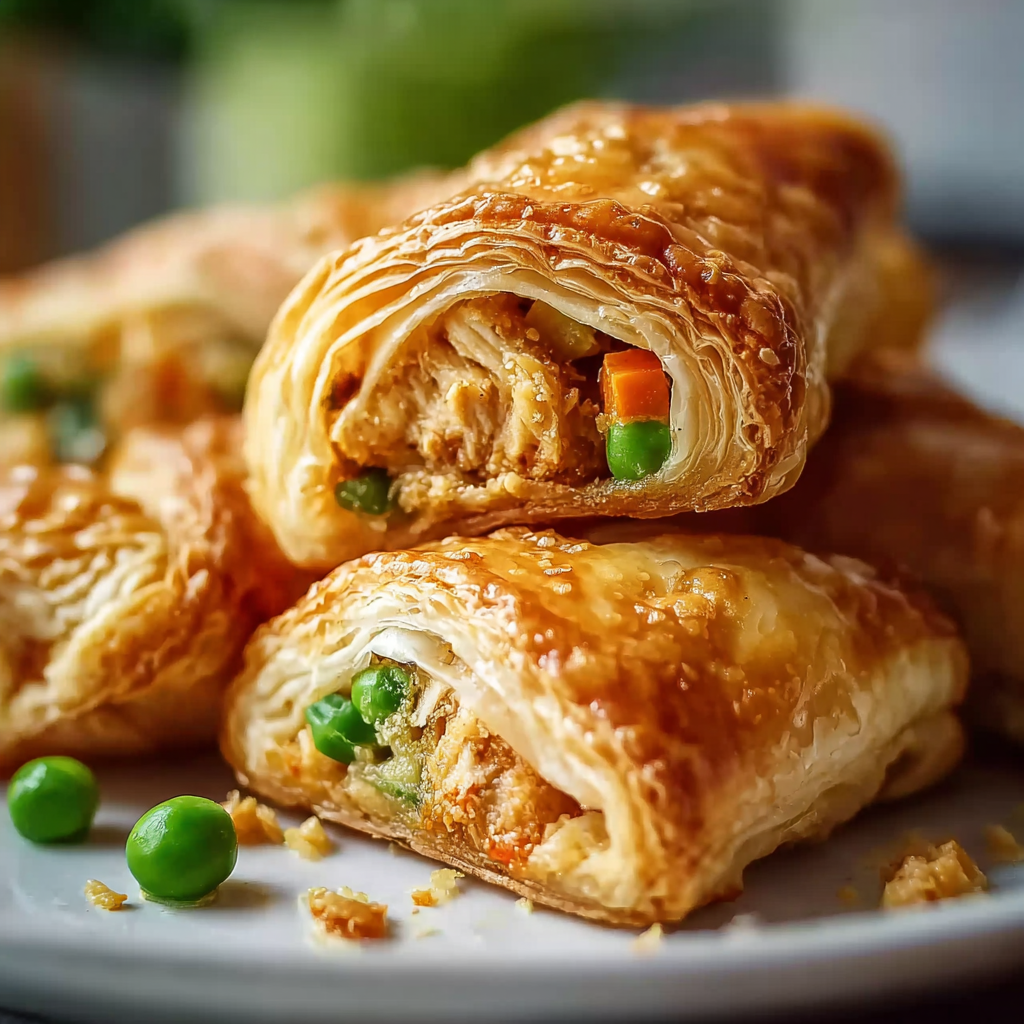
Fried Chicken Pot Pie Pockets

Golden, flaky pockets filled with shredded fried chicken and creamy vegetables — a hands-on, comforting twist on classic pot pie using pantry staples and pre-made crusts.
Why You'll Love This Recipe
- Make-ahead friendly: the filling keeps well for a day and can be portioned and frozen before baking for up to three months.
- Quick to assemble: using pre-made pie crusts and canned soup means you can have pockets ready to bake in about 15 minutes.
- Kid-approved and portable: handheld pockets are perfect for school lunches, picnics, or potlucks where you want something tidy and warm.
- Flexible ingredients: use leftover rotisserie or fried chicken, and swap vegetables based on what’s in your freezer.
- Time-saving tip: this comes together in under 40 minutes total — 15 minutes prep and 20–25 minutes baking.
When I first served these at a family game night, everyone loved how the familiar pot pie flavor was reimagined as a snack: crunchy edges, soft interior, and a savory gravy that didn’t leak during the first ten minutes of play. My aunt asked for the recipe the next day and keeps a box of crusts in the freezer now just for emergencies.
Ingredients
- Cooked fried chicken (2 cups): Shredded pieces from 1 medium fried chicken or about 2 cups. Use leftover pieces with or without extra coating — the breading adds texture. Rotisserie chicken works too if you prefer less crunch.
- Frozen mixed vegetables (1 cup): A peas/carrots/corn blend is ideal. Thaw slightly or microwave for 30 seconds to remove excess ice crystals so the filling doesn’t get watery.
- Cream of chicken soup (1/2 cup): One small can or half a standard 10.5-ounce can creates a thick, glossy sauce; use reduced-sodium if watching salt.
- Garlic powder (1 teaspoon) and onion powder (1 teaspoon): These concentrated seasonings give depth without added moisture — easy to adjust based on your taste.
- Salt and black pepper: Add cautiously if your fried chicken is already seasoned; start with 1/4 teaspoon salt and 1/8 teaspoon pepper and adjust.
- Pre-made pie crusts (1 package, contains 2 crusts): Choose all-butter or supermarket brand based on preference; all-butter crusts give richer flavor but can be slightly more fragile to handle.
- Egg (1, beaten): For egg wash to achieve that glossy, golden finish; substitute milk if you have an egg allergy, though color and shine will be slightly different.
Instructions
Preheat oven: Set the oven to 400°F (200°C). Line a baking sheet with parchment paper or a silicone mat. A hot oven is essential to create a crisp crust quickly while the filling warms through; it prevents sogginess by setting the dough fast. Prepare the filling: In a large mixing bowl, combine 2 cups shredded fried chicken, 1 cup frozen mixed vegetables, 1/2 cup cream of chicken soup, 1 teaspoon garlic powder, 1 teaspoon onion powder, and salt and pepper to taste. Mix until everything is evenly coated. If the chicken is very dry, add a tablespoon of milk to loosen the mixture. Taste and correct seasoning — because the crust is neutral, the filling should be slightly seasoned. Roll out the dough: Lightly flour your work surface and unroll the pie crusts. Using a 4 to 5-inch round cutter or a drinking glass, cut circles from the dough. Gather scraps, reroll gently once to avoid toughening, and cut until you have 10–12 circles depending on size. Keep the dough cool; if it becomes too soft, chill for 10 minutes to firm up. Fill and seal: Place about 1 to 2 tablespoons of filling in the center of each dough circle. Fold the dough over to form a half-moon. Press edges together firmly, then crimp with the tines of a fork to seal. Make sure to leave a small vent hole on top or pierce a couple of times to allow steam to escape during baking. Apply egg wash and bake: Brush each pocket with the beaten egg to ensure even browning. Arrange them on the prepared baking sheet with space between. Bake for 20–25 minutes until golden brown and the filling is bubbling lightly through the vents. If the edges brown too quickly, tent loosely with foil for the last 5 minutes. Cool and serve: Remove from oven and let cool for 5 minutes. The filling will be hot and needs a brief rest. Serve warm with optional hot sauce, gravy, or a crisp salad on the side.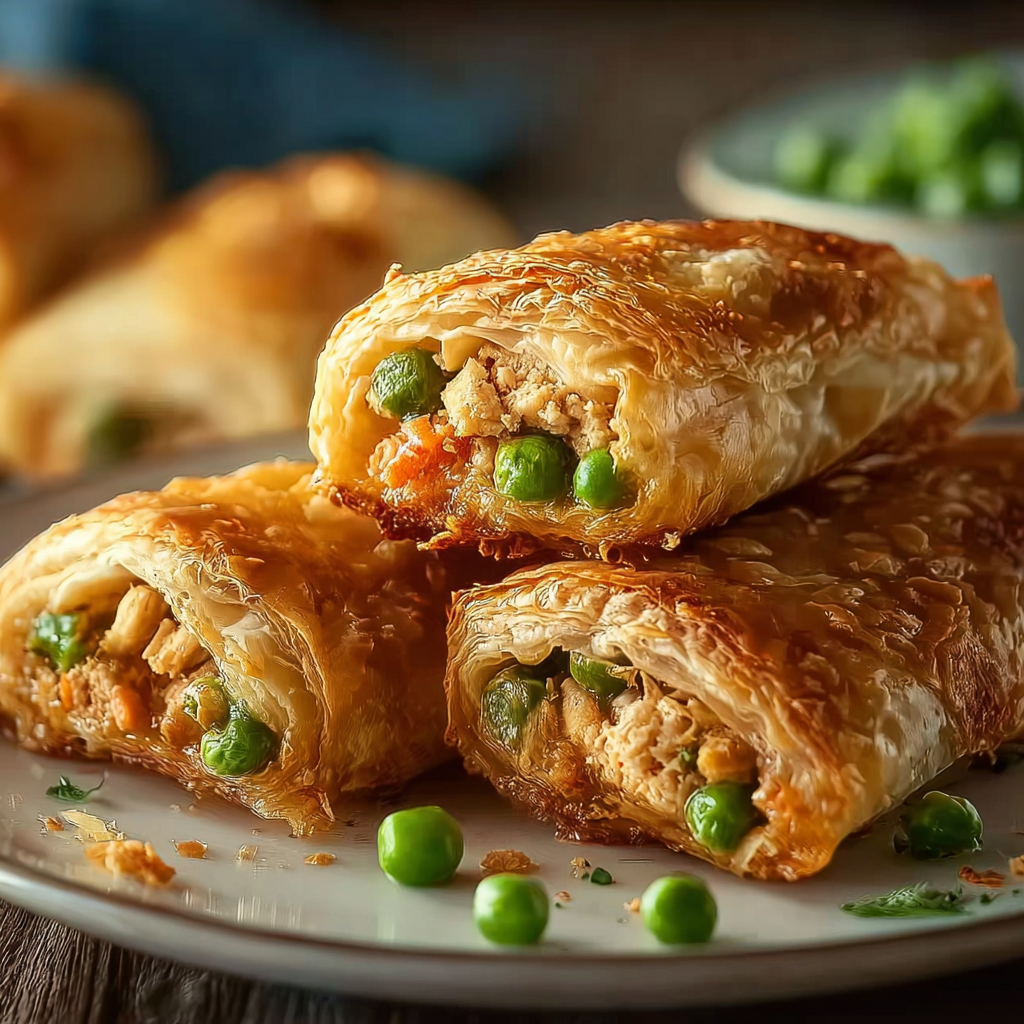
You Must Know
- These pockets freeze well unbaked: place assembled pockets on a tray, freeze until firm, then transfer to a freezer bag for up to 3 months; bake from frozen adding about 8–10 minutes to baking time.
- They are relatively high in protein thanks to the chicken, but watch sodium — canned soup and pre-made crusts often contain extra salt.
- To reheat, bake at 350°F (175°C) for 10–12 minutes or until warmed through; a toaster oven gives the crispiest result without drying out the filling.
- Leftovers keep in the refrigerator for 2–3 days in an airtight container; reheat gently to preserve pastry texture.
My favorite part is how these pockets reinvent leftovers. One batch fed a family gathering, and instead of a plate piled with pie, everyone popped a pocket and kept mingling. They’re also forgiving: different vegetables, a touch more soup, or a swap to rotisserie chicken all work without changing the soul of the dish.
Storage Tips
Store cooled pockets in an airtight container in the refrigerator for up to 3 days. For longer storage, freeze unbaked pockets on a tray until firm, then transfer to a zip-top freezer bag for up to 3 months. To bake from frozen, place on a lined sheet, brush with thawed beaten egg if available, and bake at 400°F for 28–35 minutes or until golden and hot in the center. Reheat baked pockets in a 350°F oven for 10–12 minutes to refresh the crust; avoid microwaving as it will make the dough soggy.

Ingredient Substitutions
If you don’t have fried chicken, use 2 cups shredded rotisserie or poached chicken. Replace cream of chicken soup with 1/2 cup homemade white sauce: melt 1 tablespoon butter, whisk in 1 tablespoon flour, and stir in 1/2 cup warm chicken stock until thickened. For a vegetarian version, swap chicken for shredded roasted cauliflower or chickpeas mashed slightly and use cream of mushroom soup. To make gluten-free pockets, use a store-bought gluten-free pie crust and check labels on soup and seasonings.
Serving Suggestions
Serve warm as an appetizer, lunch, or dinner alongside a crisp green salad, quick slaw, or steamed green beans. For dipping, try Dijon mayo, ranch, or a light gravy made from chicken stock. Garnish with chopped parsley or chives to brighten the plate. For a brunch twist, serve with a side of scrambled eggs and pickled vegetables to cut the richness.
Cultural Background
Handheld pies and pockets are a global comfort-food concept: from British pasties to empanadas in Latin America and samosas in South Asia. These pockets borrow the American pot pie’s creamy chicken-and-vegetable filling and adapt it into the portable pastry tradition. The result taps into classic American comfort flavors while embracing the convenience of hand pies popular across many cuisines.
Seasonal Adaptations
In winter, add diced root vegetables like parsnip or turnip and a pinch of nutmeg to the filling for warmth. Spring calls for fresh peas and chopped asparagus tips. In summer, use grilled chicken and fresh corn kernels for a brighter flavor. Swap herbs seasonally — thyme and rosemary in cooler months, basil and tarragon in warmer months — to keep the pockets feeling timely and fresh.
Meal Prep Tips
Make the filling ahead and refrigerate for up to 24 hours; this actually firms the filling so pockets are easier to assemble. Assemble pockets and freeze on a tray before transferring to bags for quick baking later. Label with date and bake directly from frozen. For packed lunches, wrap cooled pockets in parchment and tuck into an insulated lunchbox with an ice pack to keep them safe until lunchtime.
These little pockets are an invitation to experiment: change the herbs, swap a vegetable, or turn them into party-sized snacks. They started as a way to use leftovers and became a family staple — I hope they find a place at your table too. Enjoy, and don’t be surprised if everyone asks for the recipe next time you bring them out.
Pro Tips
If the pie crust becomes too soft while working, chill it for 10 minutes; cold dough seals and bakes better.
Lightly toast the shredded chicken in a skillet for a minute to revive any leftover crispiness before mixing with the sauce.
Prevent sogginess by lightly thawing frozen vegetables and patting off excess moisture before adding to the filling.
For extra shine and color, use a mixture of one beaten egg with 1 teaspoon water for the egg wash.
This nourishing fried chicken pot pie pockets recipe is sure to be a staple in your kitchen. Enjoy every moist, high protein slice — it is perfect for breakfast or as a wholesome snack any time.
FAQs about Recipes
Can I freeze the pockets?
Yes — assemble and freeze unbaked on a tray until firm, then transfer to a bag for up to 3 months. Bake from frozen, adding 8–10 minutes to the baking time.
What can I use instead of fried chicken?
Use rotisserie or poached chicken if you don't have fried chicken; the flavor will be slightly different but still delicious.
Tags
Fried Chicken Pot Pie Pockets
This Fried Chicken Pot Pie Pockets recipe makes perfectly juicy, tender, and flavorful steak every time! Serve with potatoes and a side salad for an unforgettable dinner in under 30 minutes.
Ingredients
Filling
Dough & Finish
Instructions
Preheat oven
Preheat the oven to 400°F (200°C) and line a baking sheet with parchment paper to prevent sticking and promote even browning.
Prepare filling
In a large bowl combine shredded fried chicken, thawed mixed vegetables, cream of chicken soup, garlic powder, onion powder, and salt and pepper. Stir until evenly coated; adjust seasoning as needed.
Roll out dough
Lightly flour the surface and roll out the pie crusts. Cut 4–5 inch circles with a cutter or glass. Re-roll scraps once if necessary; keep dough cool to avoid tearing.
Fill and seal
Spoon 1–2 tablespoons of filling into the center of each circle. Fold into a half-moon, press edges, and crimp with a fork. Ensure vents or small slits on top to release steam.
Egg wash and bake
Brush pockets with beaten egg for a golden finish. Arrange on the prepared sheet and bake 20–25 minutes until golden and the filling is hot and bubbly.
Cool and serve
Let pockets cool on a wire rack for 5 minutes before serving to allow the filling to set slightly. Serve warm with preferred condiments.
Last Step: Please leave a rating and comment letting us know how you liked this recipe! This helps our business to thrive and continue providing free, high-quality recipes for you.
Nutrition
Did You Make This?
Leave a comment & rating below or tag
@aiolirecipe on social media!
Categories:
You might also like...

Fall Harvest Pasta Salad
A cozy, colorful salad that celebrates autumn flavors — roasted butternut squash and Brussels sprouts tossed with pasta, cranberries, pecans, and tangy feta, finished with a balsamic vinaigrette.

Cilantro Lime Steak Bowls
Bright, tangy cilantro-lime marinated flank steak served over rice with black beans, corn, fresh veggies and creamy avocado for a fast, healthy weeknight bowl.

Pecan Pie Crescent Rolls
Buttery crescent rolls filled with a sweet pecan pie–inspired filling — a quick, crowd-pleasing dessert perfect for holidays or weeknight cravings.
Did You Make This?
Leave a comment & rating below or tag @aiolirecipe on social media!
Rate This Recipe
Share This Recipe
Enjoyed this recipe? Share it with friends and family, and don't forget to leave a review!
Comments (1)
This recipe looks amazing! Can't wait to try it.
Comments are stored locally in your browser. Server comments are displayed alongside your local comments.
Hi, I'm Olivia!
What's Popular

30-Minute Meals!
Join to receive our email series which contains a round-up of some of our quick and easy family favorite recipes.