
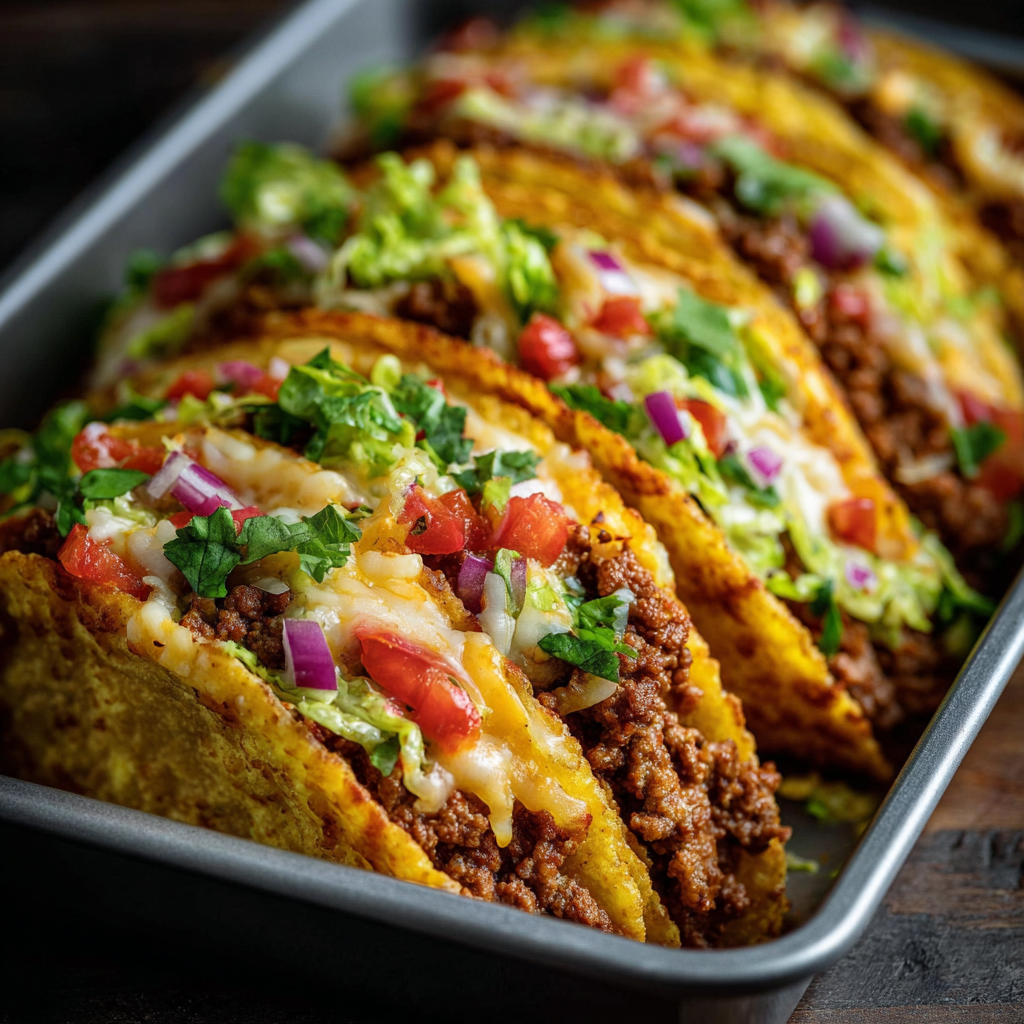
Oven-Baked Cheesy Tacos

Crispy, cheesy oven-baked tacos with a seasoned beef filling and fresh toppings — a weeknight favorite that's simple, crowd-pleasing, and ready in under 40 minutes.

Why You'll Love This Recipe
- Ready in about 35 minutes from start to finish, making it ideal for busy weeknights when you want something homey without a lot of fuss.
- Uses pantry staples like taco seasoning, tomato sauce or salsa, and shredded cheese — no specialty shopping required.
- Assembling ahead and baking just before serving makes this easy to scale up for guests or weeknight meal prep.
- Baking the tacos keeps shells upright and crisp while melting the cheese perfectly, delivering consistent results every time.
- Highly adaptable: switch proteins, make it vegetarian, or use gluten-free shells to suit dietary needs.
- Fresh toppers add texture and brightness, so you get a restaurant-style contrast between hot and cool components in every bite.
My family’s reaction the first time I served these at a casual get-together was immediate — everyone went back for seconds. I like that the method frees me from standing over the stove while guests arrive; I can finish the tacos in the oven, toss a quick salad, and focus on plating. Over time I’ve learned a few small timing tricks that always ensure the shells stay crisp while the cheese melts without burning.
Ingredients
- Ground beef (1 lb): Choose 80/20 for flavor and a little fat to carry the seasoning; leaner beef can be used but may need a splash of oil to prevent sticking.
- Onion (1 small, finely diced): Yellow or white onion works best for a balanced sweetness; dice small so it softens quickly during browning.
- Garlic (2 cloves, minced): Fresh garlic gives the best aroma; add near the end of the pan cook to avoid bitterness from overcooking.
- Taco seasoning (1 packet or homemade): A store packet is convenient; homemade mix of chili powder, cumin, paprika, garlic powder, onion powder, oregano, salt, and cayenne gives better control over heat.
- Tomato sauce or salsa (2/3 cup): Acts as a binder and adds moisture; choose a chunky salsa for extra texture or a smooth sauce for a more cohesive filling.
- Hard taco shells (8): Look for thick, sturdy shells that stand upright in a baking dish; if you prefer, use small corn tostadas or oven-crisped soft tortillas.
- Shredded cheese (2 cups): Cheddar, Monterey Jack, or a Mexican blend melt well — shred fresh for best melting and texture.
- Fresh toppings: Lettuce (1 cup shredded), tomatoes (1/2 cup diced), red onion (1/4 cup diced), cilantro (2 tbsp chopped) — these add color and crunchy contrast.
- Optional extras: Sour cream, guacamole, jalapeño slices, and hot sauce to taste — excellent for customizing heat and richness.
Instructions
Step 1 — Preheat the oven: Preheat oven to 400°F. Arrange the hard taco shells upright in a shallow baking dish so they support themselves; use two dishes if needed. Preheating ensures the shells crisp quickly while cheese melts. Step 2 — Brown the beef and onion: Heat a large skillet over medium. Add the ground beef and diced onion, breaking the meat up with a spatula. Cook until no longer pink and the onions are translucent, about 6–8 minutes. Drain excess fat to avoid soggy shells. Step 3 — Add garlic and seasoning: Add minced garlic and the taco seasoning to the skillet; stir for 30–60 seconds until fragrant. This quick toast of spices intensifies flavor without burning the garlic. Step 4 — Stir in tomato sauce and simmer: Pour in 2/3 cup tomato sauce or salsa, reduce heat to low, and simmer gently for about 3–5 minutes to let flavors meld and the mixture thicken slightly. Taste and adjust salt and pepper. Step 5 — Fill shells and top with cheese: Spoon the seasoned beef evenly into the prepared shells — about 2 tablespoons to 3 tablespoons per shell depending on size. Generously sprinkle shredded cheese over each filled shell to cover the meat and create a golden top. Step 6 — Bake until golden: Place the baking dish in the preheated oven and bake for 10–15 minutes. Look for cheese that is melted and bubbling and shell edges that are golden but not burned. If the cheese browns too fast, lower the oven to 375°F and extend time by a few minutes. Step 7 — Add fresh toppings and serve: Remove tacos from oven and immediately top with shredded lettuce, diced tomatoes, red onion, and cilantro. Serve hot with sour cream, guacamole, jalapeño slices, and hot sauce on the side.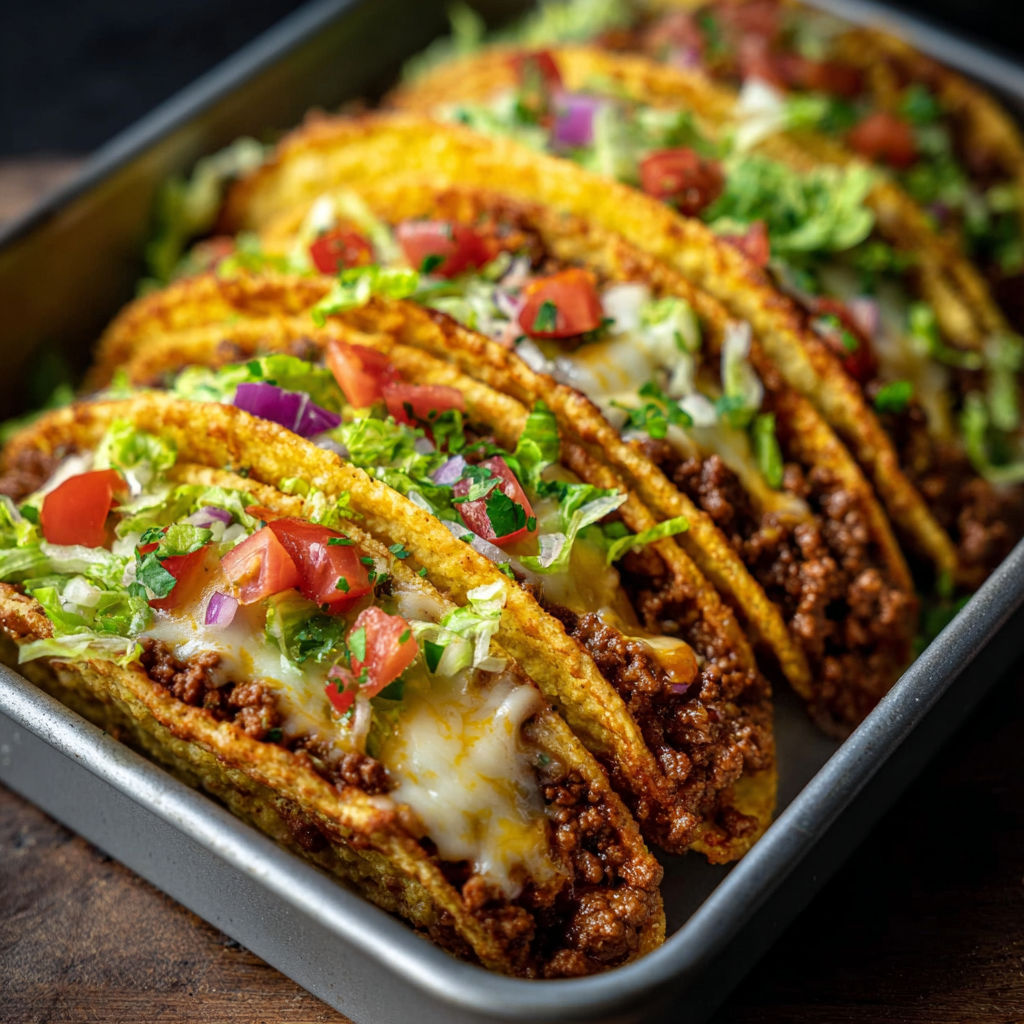
You Must Know
- These tacos hold up well for short-term serving but are best eaten immediately for optimal crispness; assembled tacos can be held 10–15 minutes at warm oven temperature without losing texture.
- Freeze cooked seasoned beef in an airtight container for up to 3 months; thaw in the refrigerator overnight and reheat in a skillet before assembling and baking.
- The recipe yields 8 tacos and serves four comfortably (two tacos per person) making it scalable for larger groups.
- Because cheese contains dairy and some shells may contain gluten, adjust for allergies by using dairy-free cheese and certified gluten-free shells when needed.
What I love most is how dependable this method is: browning the meat well and finishing in the oven gives consistent texture that guests notice. I often prepare the filling a day ahead and reheat it while the oven warms; this cuts active time significantly without sacrificing flavor. Friends have told me they appreciate the make-ahead flexibility, especially for casual gatherings where you want to minimize last-minute fuss while still serving something hot and festive.
Storage Tips
Store leftover assembled tacos in an airtight container in the refrigerator for up to 2 days, but expect shells to soften as moisture migrates from the filling. For best results, store the seasoned beef separately in the fridge for up to 3 days and keep toppings in separate containers. To freeze, place cooled seasoned meat in freezer-safe bags for up to 3 months; thaw overnight in the refrigerator and reheat gently in a skillet. Re-crisp shells in a 375°F oven for 5 minutes before assembling to restore crunch. When reheating assembled tacos, use a 350°F oven and cover loosely with foil for 5–8 minutes to avoid over-browning.
Ingredient Substitutions
Swap ground beef for ground turkey, chicken, or a plant-based crumble for different dietary needs — adjust seasoning as leaner proteins may need a tablespoon of oil. For a vegetarian option, use cooked black beans or a mixture of black beans and sweet potato; mash slightly so the filling sticks together. Replace hard shells with small flour tortillas for soft tacos or use baked corn tostadas for extra crunch. Use salsa instead of tomato sauce to add brightness, or stir in a splash of beef broth if the filling seems dry. For lower sodium, use low-sodium taco seasoning or make your own to control salt levels.
Serving Suggestions
Serve with a simple side of cilantro-lime rice or a bright Mexican street corn salad for a heartier meal. For a light plate, pair with a crisp cabbage slaw dressed with lime, olive oil, and a pinch of sugar. Garnish tacos with thinly sliced radishes, cotija cheese, or pickled red onions for contrast. Offer a trio of salsas — mild, roasted, and green tomatillo — so guests can customize heat. For a party, set up a toppings bar with guacamole, crema, chopped cilantro, lime wedges, and sliced jalapeños so everyone builds their perfect bite.
Cultural Background
These oven-finished tacos are a Tex-Mex adaptation of traditional Mexican street tacos, blending American convenience with Mexican flavors. While authentic taquerias often use fresh corn tortillas and simple chopped toppings, the baked method grew in popularity in home kitchens as a way to serve many tacos with minimal last-minute assembly. The combination of seasoned meat, melted cheese, and crisp shell reflects a cross-cultural evolution that celebrates bold spices and contrasting textures. This version leans into American preferences for melted cheese and convenience while staying true to the core elements of seasoned meat and fresh garnishes.
Seasonal Adaptations
Adjust toppings with the seasons: in summer, top with fresh corn kernels, ripe avocado, and heirloom tomatoes; in fall or winter, try roasted sweet potatoes, pickled jalapeños, and a smoky chipotle crema. For holiday gatherings, swap typical toppings for roasted peppers and caramelized onions and serve alongside a winter squash salad. The filling also accepts seasonal spice changes — add a pinch of cinnamon and smoked paprika for a deeper autumnal flavor or bright citrus zest and chopped herbs for a spring twist.
Meal Prep Tips
Cook and cool the seasoned beef ahead and portion into meal-sized containers. Store shredded lettuce and diced tomatoes separately in paper-lined containers to prevent sogginess. Pre-shred cheese and keep it chilled until needed. On baking day, preheat the oven and assemble tacos 10 minutes before serving so you only have the final bake step left; this reduces active time to under 15 minutes. For weekly lunches, reheat the filling and serve over salads or in grain bowls for taco-inspired meals throughout the week.
In the end, these oven-baked cheesy tacos are an easy, dependable go-to that balance convenience and flavor. They’re perfect for busy families, informal get-togethers, or any night you want something comforting and customizable. Give the make-ahead tips a try the next time you host — you’ll like how much less you’re rushing while still serving something that earns compliments.
Pro Tips
Brown the beef until it is well caramelized for deeper flavor; don’t rush the browning step.
Drain excess fat after browning to keep shells from becoming soggy during baking.
Shred your own cheese from a block for better melting and less grease than pre-shredded varieties.
Assemble tacos just before baking; if assembling early, keep filling and shells separate until ready to bake.
This nourishing oven-baked cheesy tacos recipe is sure to be a staple in your kitchen. Enjoy every moist, high protein slice — it is perfect for breakfast or as a wholesome snack any time.
Tags
Oven-Baked Cheesy Tacos
This Oven-Baked Cheesy Tacos recipe makes perfectly juicy, tender, and flavorful steak every time! Serve with potatoes and a side salad for an unforgettable dinner in under 30 minutes.
Ingredients
Filling
Tacos & Toppings
Instructions
Preheat the oven
Preheat oven to 400°F and arrange hard taco shells upright in a shallow baking dish so they stay supported during baking.
Brown beef and onion
Heat a large skillet over medium. Add ground beef and diced onion, breaking the meat into small pieces. Cook 6–8 minutes until browned and onions are translucent, then drain excess fat.
Add garlic and seasoning
Stir in minced garlic and taco seasoning, cook for 30–60 seconds until fragrant to toast the spices without burning the garlic.
Simmer with tomato sauce
Pour in 2/3 cup tomato sauce or salsa, reduce heat, and simmer 3–5 minutes until the mixture thickens slightly and flavors meld.
Assemble the tacos
Spoon seasoned beef into each taco shell, filling evenly, then top each filled shell with a generous amount of shredded cheese.
Bake until cheese melts
Bake in the preheated oven for 10–15 minutes, watching for melted, bubbling cheese and golden shell edges. Lower oven to 375°F if cheese browns too fast.
Add fresh toppings and serve
Remove from oven and top with shredded lettuce, diced tomatoes, red onion, and cilantro. Serve with sour cream, guacamole, and hot sauce.
Last Step: Please leave a rating and comment letting us know how you liked this recipe! This helps our business to thrive and continue providing free, high-quality recipes for you.
Nutrition
Did You Make This?
Leave a comment & rating below or tag
@aiolirecipe on social media!
Categories:
You might also like...

Fall Harvest Pasta Salad
A cozy, colorful salad that celebrates autumn flavors — roasted butternut squash and Brussels sprouts tossed with pasta, cranberries, pecans, and tangy feta, finished with a balsamic vinaigrette.

Cilantro Lime Steak Bowls
Bright, tangy cilantro-lime marinated flank steak served over rice with black beans, corn, fresh veggies and creamy avocado for a fast, healthy weeknight bowl.

Pecan Pie Crescent Rolls
Buttery crescent rolls filled with a sweet pecan pie–inspired filling — a quick, crowd-pleasing dessert perfect for holidays or weeknight cravings.
Did You Make This?
Leave a comment & rating below or tag @aiolirecipe on social media!
Rate This Recipe
Share This Recipe
Enjoyed this recipe? Share it with friends and family, and don't forget to leave a review!
Comments (1)
This recipe looks amazing! Can't wait to try it.
Comments are stored locally in your browser. Server comments are displayed alongside your local comments.
Hi, I'm Olivia!
What's Popular

30-Minute Meals!
Join to receive our email series which contains a round-up of some of our quick and easy family favorite recipes.