
Peanut Butter Chocolate Cupcakes – Easy Dessert

Decadent chocolate cupcakes filled and topped with creamy peanut butter and finished with melted chocolate and a mini peanut butter cup.
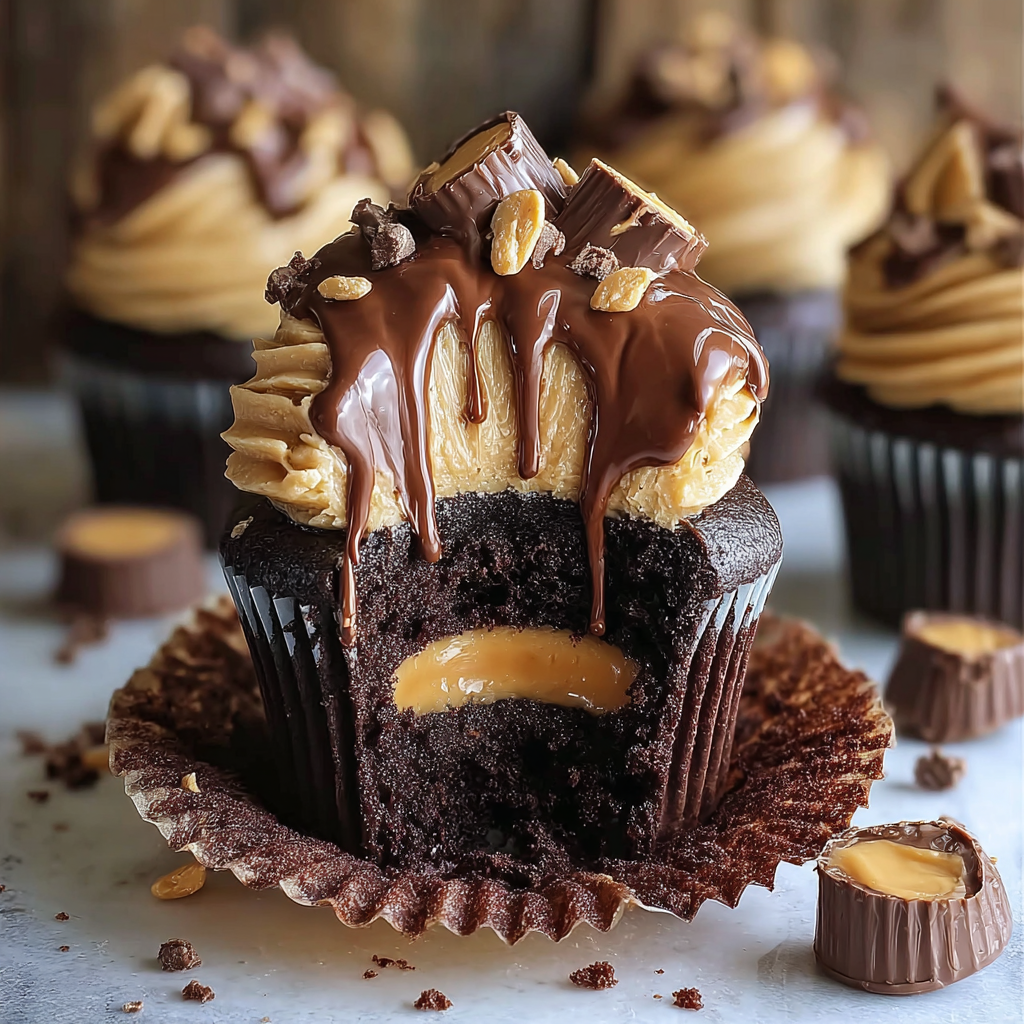
This Peanut Butter Chocolate Cupcake is one of those recipes that instantly transports me to Sunday afternoons in my grandmother's kitchen, where the scent of cocoa and peanut butter meant family and celebration. I first developed this version while trying to combine two all time favorites into a single handheld treat. The result is a moist chocolate base with a tender crumb and a sweet, silky peanut butter center. Every bite delivers the contrast of deep chocolate and nutty sweetness, rounded out by a glossy chocolate drizzle and a miniature peanut butter cup on top.
What makes these cupcakes special is the balance between texture and flavor. The cake crumb stays soft because of the buttermilk and vegetable oil, while the peanut butter filling adds a creamy density that keeps each bite interesting. I discovered the method for filling after a few trial runs that involved hollowing with a melon baller and then refining the amount so each cupcake is neither overstuffed nor skimpy. Family and friends always ask for a second helping at gatherings, which is the true test of a successful dessert in my house.
Why You'll Love This Recipe
- Ready in under an hour from start to finish, making it ideal for last minute dessert plans and small celebrations.
- Uses pantry staples such as all purpose flour, sugar, cocoa powder, and peanut butter so you can often make it without a special trip to the store.
- Batter is forgiving and does not require complex folding techniques, which is great for bakers at any skill level.
- Make ahead the filling and melted chocolate up to two days in advance to save time when entertaining.
- Highly adaptable for dietary preferences by switching to vegan egg alternatives and dairy free milk if needed.
- Crowd pleasing combination of flavors that works for birthday parties, potlucks, or a special weeknight treat.
I remember taking a batch to a neighbor block party and watching them disappear in thirty minutes. People commented on the moist cake and how the peanut butter felt homemade rather than overly sweet. That motivated me to write down exact measurements and the short list of techniques that ensure consistent results every time.
Ingredients
- All purpose flour: Use one cup, spooned and leveled for accuracy. The flour provides structure and a tender crumb. King Arthur or Gold Medal are reliable brands for even texture.
- Granulated sugar: One cup adds sweetness and supports a moist crumb. Use regular white sugar; it helps with aeration when creamed briefly into the wet ingredients.
- Unsweetened cocoa powder: Half cup of a good quality powder such as Dutch processed or natural will shape the chocolate intensity. Dutch processed gives a deeper flavor while natural gives brighter cocoa notes.
- Baking powder and baking soda: One teaspoon baking powder and half teaspoon baking soda work together to lift the cupcakes and counteract the density from peanut butter.
- Salt: Half teaspoon to enhance overall flavor and balance sweetness.
- Vegetable oil: Half cup keeps the cake tender and shelf stable. Neutral oils like canola or sunflower are excellent.
- Buttermilk: One cup adds acidity that reacts with the leaveners to produce a light texture. Cultured buttermilk from the dairy aisle is ideal.
- Eggs: Two large eggs for structure and richness. Room temperature eggs incorporate more evenly.
- Vanilla extract: One teaspoon to round and lift the chocolate notes.
- Creamy peanut butter: One cup for the filling and frosting. Choose a jar you like to eat on toast, as the flavor carries through.
- Powdered sugar: Half cup to sweeten and thicken the peanut butter filling to a pipeable consistency.
- Milk: Quarter cup to adjust the filling texture; use whole milk for creaminess.
- Chocolate chips: One cup, melted for drizzling. Semi sweet chips give balance to the peanut butter.
- Mini peanut butter cups: Twelve for garnish, one per cupcake, placed on top for a professional finishing touch.
Instructions
Preheat and prepare pans:Preheat the oven to 350 degrees Fahrenheit. Line a 12 cup muffin tin with paper liners. This ensures even baking and easy removal. Set an oven rack to the middle position so cupcakes bake evenly without the edges browning too quickly.Combine dry ingredients:Sift together one cup all purpose flour, one cup granulated sugar, half cup unsweetened cocoa powder, one teaspoon baking powder, half teaspoon baking soda, and half teaspoon salt into a large mixing bowl. Sifting removes lumps from cocoa and aerates the mixture which helps a light crumb.Whisk wet ingredients:In a separate bowl whisk half cup vegetable oil, one cup buttermilk, two large eggs, and one teaspoon vanilla extract until smooth. Make sure eggs are at room temperature for better emulsion which yields a consistent batter.Combine batter:Pour the wet ingredients into the dry ingredients and stir gently until just combined. Avoid over mixing which will develop gluten and make the cupcakes dense. A few small streaks of flour are fine; the batter will finish smoothing as you spoon it into liners.Fill and bake:Spoon batter into liners filling each about two thirds full. Bake for 18 to 20 minutes or until a toothpick inserted into the center comes out clean or with a few moist crumbs but no raw batter. Rotate the pan halfway through baking for even color if your oven has hotspots.Cool completely:Transfer cupcakes to a wire rack to cool for 10 minutes in the tin then remove and cool completely before filling. If you try to core them while warm the crumb will tear and become gummy.Make the peanut butter filling:Beat together one cup creamy peanut butter, half cup powdered sugar, and quarter cup milk until light and fluffy. If the filling seems too loose add a tablespoon more powdered sugar. For extra smoothness, beat at medium speed for 2 minutes.Core and fill:Use a small paring knife or a melon baller to cut a small cone shaped hole from the center of each cupcake. Spoon or pipe the peanut butter mixture into the cavity until slightly mounded. Keep the removed crumb pieces to replace the tops if you prefer a hidden filling.Top and finish:Pipe additional peanut butter frosting on each cupcake. Melt one cup chocolate chips in 20 second bursts in the microwave, stirring between bursts until smooth. Drizzle melted chocolate over the tops and press one mini peanut butter cup into the center of each while the drizzle is still tacky. Chill for 10 minutes to set the chocolate if desired.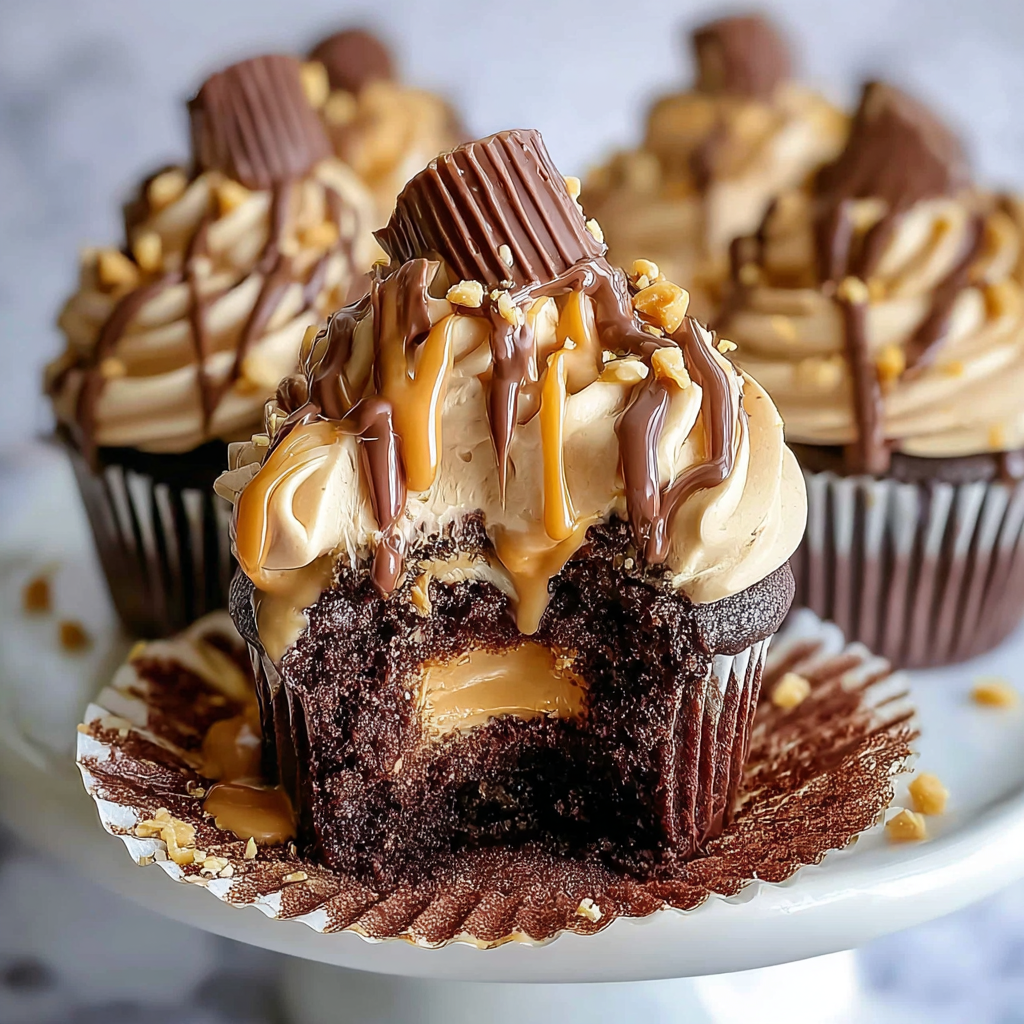
You Must Know
- These hold well in an airtight container at room temperature for up to two days. Refrigerate for up to five days but bring to room temperature before serving for best texture.
- They freeze well for up to three months. Wrap individually in plastic wrap and place in a freezer bag. Thaw in the refrigerator overnight and finish with a quick room temperature rest before serving.
- High in calories and fat due to peanut butter and oil, so they are best as an occasional treat.
- If you need nut free, substitute the filling with sunbutter but note the flavor will change.
My favorite part about this treat is how the mini peanut butter cup crowning each cupcake turns an ordinary dessert into something playful and celebratory. I have served these at casual barbecues and at formal dinners and they work in both settings because they are easy to pick up and eat, and they hold their shape while still feeling indulgent. Watching kids unpeel the liner and find the peanut butter core never gets old.
Storage Tips
Store finished cupcakes in an airtight container at room temperature for up to two days. If your home is warm, place them in the refrigerator to prevent the peanut butter from softening too much. For longer storage, freeze cooled cupcakes on a tray until firm, then transfer to a freezer safe bag. Thaw overnight in the refrigerator and then leave at room temperature for 20 to 30 minutes to soften before serving. Avoid storing directly under heat or sunlight to maintain the chocolate sheen.
Ingredient Substitutions
If you need to make swaps, try using 1 cup yogurt plus two tablespoons oil in place of buttermilk for a slight tang. For a lighter cupcake, reduce oil to 5 tablespoons and add two tablespoons applesauce, though the crumb will be slightly less tender. Use creamy almond butter in the filling if you prefer a different nut flavor. To make this dairy free, use non dairy milk and ensure chocolate chips and powdered sugar are labeled dairy free. Note that substitutions will alter taste and texture, but the overall structure remains reliable.
Serving Suggestions
Serve these with a tall glass of cold milk or a small scoop of vanilla ice cream for contrast. For a party tray, arrange on a cake stand and garnish with extra chopped roasted peanuts for crunch. They pair well with salted coffee or a chocolate stout for adult gatherings. For a more refined presentation, dust with a tiny pinch of cocoa powder around the plate edge and add a mint leaf for color contrast.

Cultural Background
The marriage of peanut butter and chocolate is classic American comfort food with roots in early 20th century candy making. Iconic confections like the peanut butter cup popularized the combination. Cupcakes themselves evolved from domestic baking traditions as individually portioned cakes that gained popularity for their convenience and charm. This recipe is a modern take that preserves nostalgic flavors while applying contemporary techniques like piping and precise filling to elevate a familiar pairing.
Seasonal Adaptations
In colder months add a pinch of cinnamon and substitute dark chocolate for a deeper flavor profile. For summer gatherings, make mini versions and chill them slightly before serving for a refreshed treat. At holiday time, swap mini peanut butter cups for crushed peppermint candies and use white chocolate drizzle for a festive appearance. Seasonal nuts or flavored extracts can make subtle but effective changes to the basic formula.
Success Stories
Readers have reported bringing these to bake sales and receiving multiple requests for the recipe. One friend used the batter to make a layered party cake and said the peanut butter filling made it the favorite dessert of the evening. A neighbor doubled the filling for an electric, peanut butter heavy version that was irresistible to adults. These stories remind me that simple recipes often bring the most joy.
Meal Prep Tips
Make the batter and bake cupcakes a day ahead, then prepare the filling and chocolate drizzle the next day. Keep components separate until the day you plan to serve. Use disposable piping bags for quick cleanup when hosting. For boxed transport to events, arrange cupcakes in a shallow box with a layer of parchment to prevent sticking and keep a small cooler on hand if you expect warm temperatures.
These cupcakes are a dependable way to share something indulgent and made with care. They balance nostalgia and technique and invite experimentation. Make them your own and enjoy sharing them with people you love.
Pro Tips
Use room temperature eggs to create a smoother batter and better rise.
Measure flour by spooning into the cup and leveling with a knife to avoid dense cupcakes.
Beat the peanut butter filling until light to make it pipe easily without being too stiff.
Cool cupcakes completely before coring to prevent tearing of the crumb.
Melt chocolate in short bursts and stir to avoid burning and grainy texture.
This nourishing peanut butter chocolate cupcakes – easy dessert recipe is sure to be a staple in your kitchen. Enjoy every moist, high protein slice — it is perfect for breakfast or as a wholesome snack any time.
Tags
Peanut Butter Chocolate Cupcakes – Easy Dessert
This Peanut Butter Chocolate Cupcakes – Easy Dessert recipe makes perfectly juicy, tender, and flavorful steak every time! Serve with potatoes and a side salad for an unforgettable dinner in under 30 minutes.
Ingredients
Batter
Filling and Topping
Instructions
Preheat and prepare
Preheat oven to 350 degrees Fahrenheit and line a 12 cup muffin tin with paper liners. Place the oven rack in the middle position.
Combine dry ingredients
Sift together flour, sugar, cocoa powder, baking powder, baking soda, and salt into a large bowl to remove lumps and aerate the mixture.
Mix wet ingredients
In a separate bowl whisk together vegetable oil, buttermilk, eggs, and vanilla extract until smooth and well combined.
Make the batter
Pour the wet ingredients into the dry ingredients and mix gently until just combined. Avoid over mixing to keep the crumb tender.
Fill and bake
Spoon the batter into liners filling about two thirds full and bake for 18 to 20 minutes or until a toothpick inserted comes out clean. Cool completely on a wire rack.
Prepare filling
Beat together creamy peanut butter, powdered sugar, and milk until light and fluffy. Adjust texture with additional powdered sugar if necessary.
Core and fill cupcakes
Cut a small hole from the center of each cooled cupcake and fill with the peanut butter mixture using a spoon or piping bag.
Top and finish
Pipe more peanut butter frosting on top, drizzle with melted chocolate, and garnish with a mini peanut butter cup. Chill briefly to set the chocolate if needed.
Last Step: Please leave a rating and comment letting us know how you liked this recipe! This helps our business to thrive and continue providing free, high-quality recipes for you.
Nutrition
Did You Make This?
Leave a comment & rating below or tag
@aiolirecipe on social media!
Categories:
You might also like...

Fall Harvest Pasta Salad
A cozy, colorful salad that celebrates autumn flavors — roasted butternut squash and Brussels sprouts tossed with pasta, cranberries, pecans, and tangy feta, finished with a balsamic vinaigrette.

Cilantro Lime Steak Bowls
Bright, tangy cilantro-lime marinated flank steak served over rice with black beans, corn, fresh veggies and creamy avocado for a fast, healthy weeknight bowl.

Pecan Pie Crescent Rolls
Buttery crescent rolls filled with a sweet pecan pie–inspired filling — a quick, crowd-pleasing dessert perfect for holidays or weeknight cravings.
Did You Make This?
Leave a comment & rating below or tag @aiolirecipe on social media!
Rate This Recipe
Share This Recipe
Enjoyed this recipe? Share it with friends and family, and don't forget to leave a review!
Comments (1)
This recipe looks amazing! Can't wait to try it.
Comments are stored locally in your browser. Server comments are displayed alongside your local comments.
Hi, I'm Olivia!
What's Popular

30-Minute Meals!
Join to receive our email series which contains a round-up of some of our quick and easy family favorite recipes.