
Perfect Vampire Blood Drip Cake

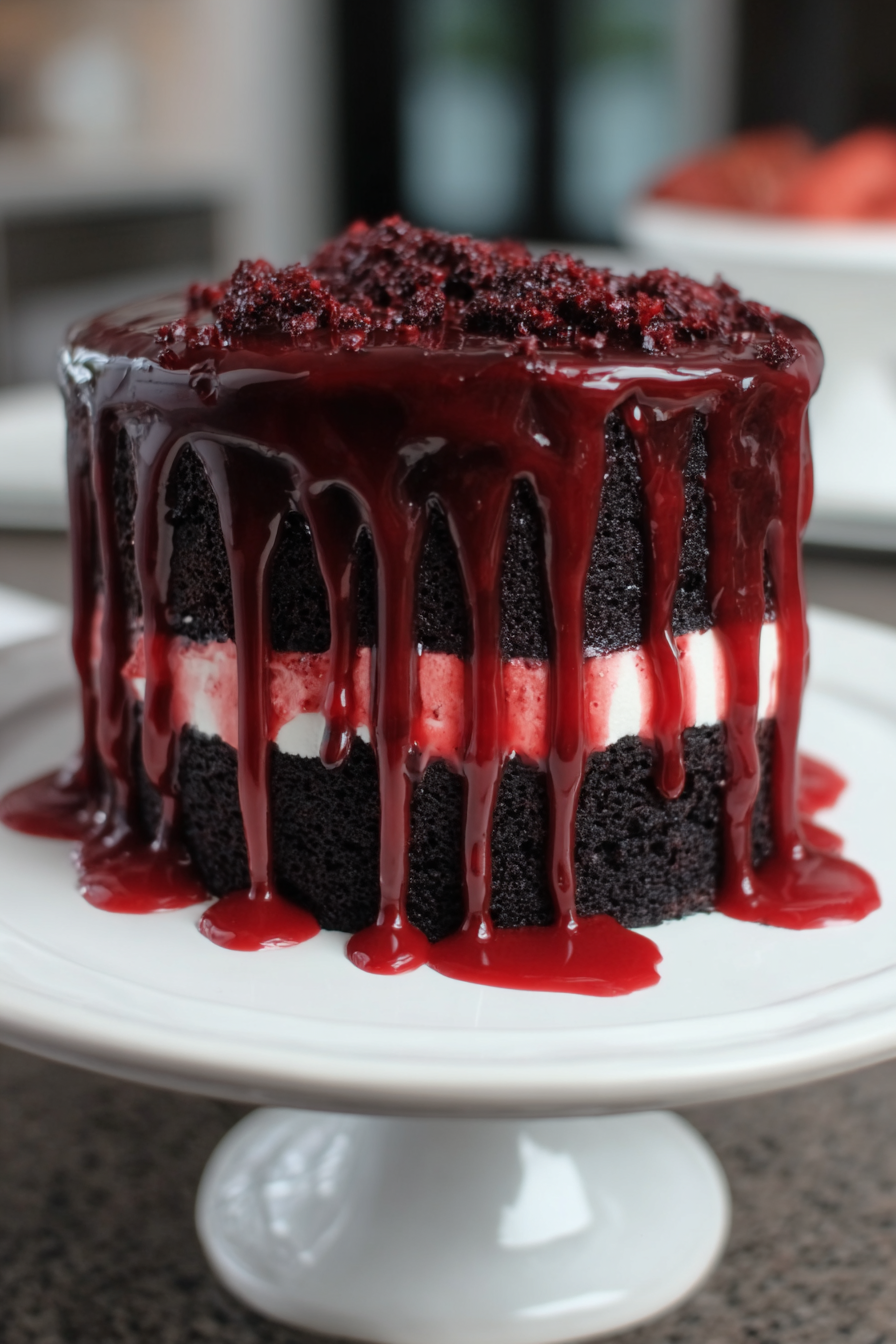
A dramatic chocolate layer cake finished with a glossy, ruby red blood drip and silky ganache decorations. Showstopping dessert for parties and spooky celebrations.
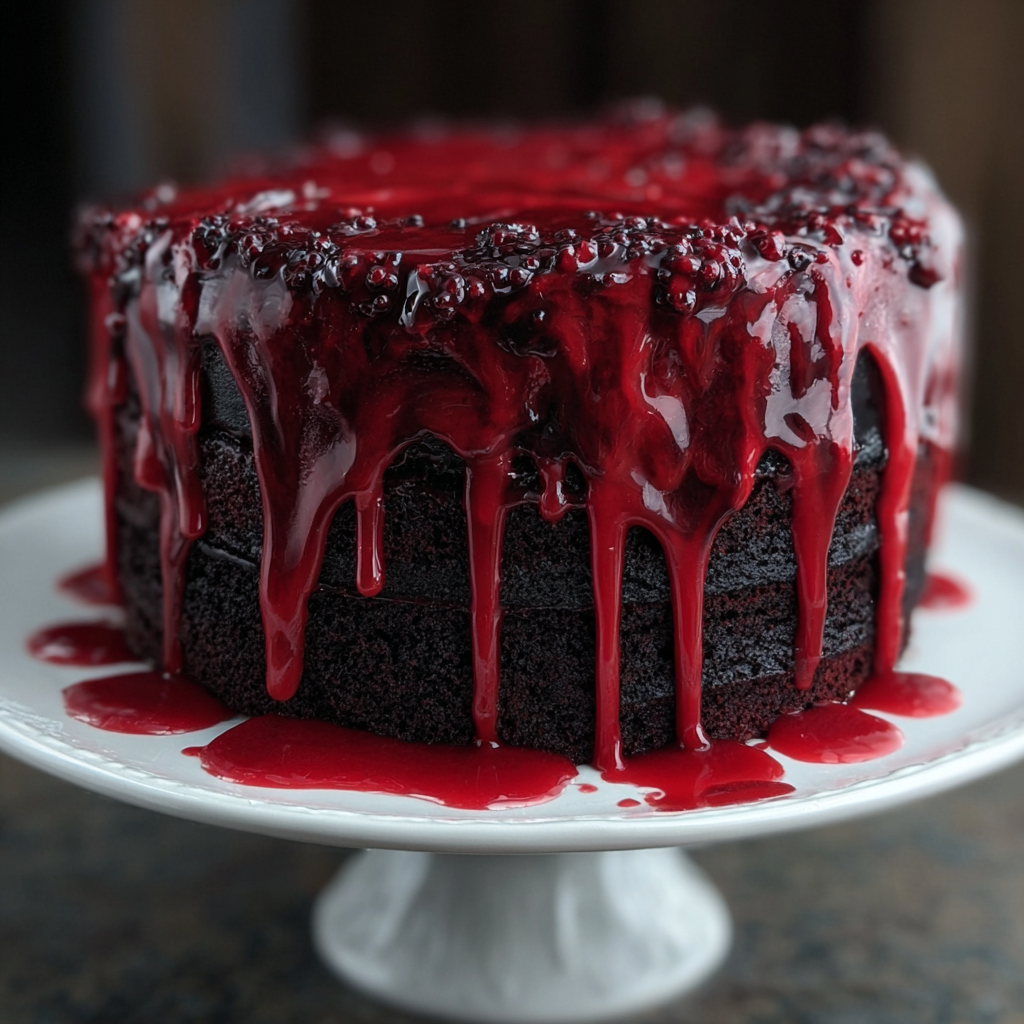
This cake came into my kitchen the first October I decided to host a themed dinner for close friends. I wanted something theatrical but genuinely delicious, not just a prop. The result was this moist, dark chocolate layer cake with a glossy, crimson drip that looks dramatic and tastes irresistible. I discovered the balance between the cocoa-forward crumb and the shiny syrupy drip after a few tests; too thin and it runs off in one go, too thick and it sits like a paste. Now I make it whenever I want a dessert that makes people stop mid-conversation to take a picture.
The texture is rich but not heavy thanks to black coffee and vegetable oil which keep the crumb tender and deepen the chocolate flavor. The drip uses heavy cream and corn syrup to achieve a glassy sheen before adding concentrated red food coloring for the perfect blood tone. Bring together a silky ganache for decorations and you have a cake that feels decadent and seasonal. Every bite has that interplay of bitter cocoa, sweet syrup, and smooth ganache that keeps you coming back.
Why You'll Love This Recipe
- Striking presentation with minimal skill required the first time you try it; the drip technique is forgiving and instantly impressive.
- Ready in under an hour of active time; most of the process is hands-off baking and cooling so you can prepare other elements or entertain guests.
- Uses pantry and grocery staples like all-purpose flour, cocoa powder, and corn syrup so you likely have everything on hand or can pick items easily.
- Flexible decorations: the ganache can be piped or spread, and the drip can be tinted from bright scarlet to deep burgundy depending on how much coloring you use.
- Makes two generous 9-inch rounds, serving a crowd for parties, potlucks, or a themed dinner; stores well and travels with care.
- Make-ahead friendly: bake the layers a day ahead and assemble the day of for the freshest drip shine.
My friends still talk about the first time I brought this out. The candlelight catches the glossy drip and everyone leans in. It has become my go-to for Halloween but also shows up at book club and dinner parties whenever I want to make an impression with something that tastes as good as it looks.
Ingredients
- All-purpose flour: 2 cups. Use a reliable brand such as King Arthur or Gold Medal. Spoon into your measuring cup and level off for accuracy. Flour provides structure and a tender crumb when balanced with the fluid ingredients.
- Granulated sugar: 1 3/4 cups. Regular white sugar keeps the cake moist and helps create the tender crumb; pack or spoon method is not necessary for granulated sugar.
- Cocoa powder: 3/4 cup. Use unsweetened Dutch-process for a darker, smoother chocolate flavor or natural cocoa for a brighter chocolate note. Brands like Valrhona or Ghirardelli work well.
- Baking soda and baking powder: 2 teaspoons baking soda and 1 teaspoon baking powder. These leaveners produce a lift and a light texture; make sure they are fresh for best rise.
- Salt: 1 teaspoon. Balances sweetness and enhances the chocolate.
- Eggs: 2 large eggs at room temperature. Eggs build structure and help with emulsification for a consistent batter.
- Buttermilk: 1 cup. The acidity reacts with baking soda to create a tender crumb; if you do not have buttermilk, make a quick substitute with 1 cup milk plus 1 tablespoon lemon juice.
- Strong black coffee: 1 cup. Cooled. Coffee intensifies chocolate without tasting like coffee; use brewed espresso or strong drip coffee.
- Vegetable oil: 1/2 cup. Keeps the cake moist and extends shelf life compared with butter-based cakes.
- Vanilla extract: 2 teaspoons. Adds aromatic warmth and rounds the chocolate flavor.
- Heavy cream: 1 cup for the blood drip. Provides body and a glossy finish when mixed with corn syrup.
- Corn syrup: 1/2 cup. Light corn syrup creates that glass-like sheen and prevents crystallization in the drip.
- Red food coloring: Several teaspoons or gel concentrate to reach a deep, realistic red. Gel colorings produce more intense hues without thinning the syrup.
- Chocolate ganache: 1 batch for finishing. Use a 2:1 chocolate to cream ratio for a thicker ganache that can be piped decoratively, or 1:1 for a softer pourable ganache.
Instructions
Preheat and prepare pans: Preheat the oven to 350°F. Grease and flour two 9-inch round cake pans, tapping out excess flour. Line the bottom with parchment rounds for easier release. Proper pan preparation ensures clean edges and easy stacking. Combine dry ingredients: In a large bowl whisk together 2 cups all-purpose flour, 1 3/4 cups sugar, 3/4 cup cocoa powder, 2 teaspoons baking soda, 1 teaspoon baking powder, and 1 teaspoon salt. Sifting is optional but helps remove lumps and evenly distributes leavening. Add wet ingredients: Whisk in 2 large eggs, 1 cup buttermilk, 1 cup strong black coffee (cooled), 1/2 cup vegetable oil, and 2 teaspoons vanilla extract until smooth. Beat briefly with an electric mixer on medium speed about 45 to 60 seconds to fully emulsify; overmixing will develop gluten and toughen the cake. Divide and bake: Divide batter evenly between the two prepared pans. Tap the pans on the counter to release large air bubbles. Bake 30 to 35 minutes until a toothpick inserted in the center comes out clean or with a few moist crumbs. Rotate pans once halfway through for even browning if your oven has hot spots. Cool completely: Let cakes cool in the pans for 10 to 15 minutes, then invert onto wire racks and peel off parchment. Cool completely to room temperature before stacking; warm cake leads to melted drip and ganache slipping off. Prepare the blood drip: In a small saucepan gently heat 1 cup heavy cream with 1/2 cup corn syrup over medium-low heat until it just begins to steam. Remove from heat and stir. Add red food coloring a few drops at a time until you reach a vivid red; gel color may require less. Allow the mixture to cool to lukewarm so it will set slightly on contact with a chilled cake but still flow for a natural drip. Assemble and fill: Place the first cake layer on a cake board or serving plate. Spread a layer of frosting or ganache about 1/3 inch thick. Top with the second cake layer and gently press to level. Chill the stacked cake in the refrigerator for 15 to 20 minutes to firm up the crumb coat, which helps control the drip. Apply the drip: Remove the cake from the refrigerator. Using a small ladle or spoon, pour the blood drip at the edge of the top layer, allowing it to run naturally down the sides. Fill the center last and smooth gently. If the drip is too runny, chill the syrup briefly to thicken; if it is too thick, whisk in a teaspoon of warmed cream to loosen it. Finish with ganache: Pipe or spoon the prepared chocolate ganache on top for decoration. Use a chilled piping bag to create rosettes or small pools of ganache near the drips. Return the cake to the refrigerator for 10 minutes to set the finish before serving.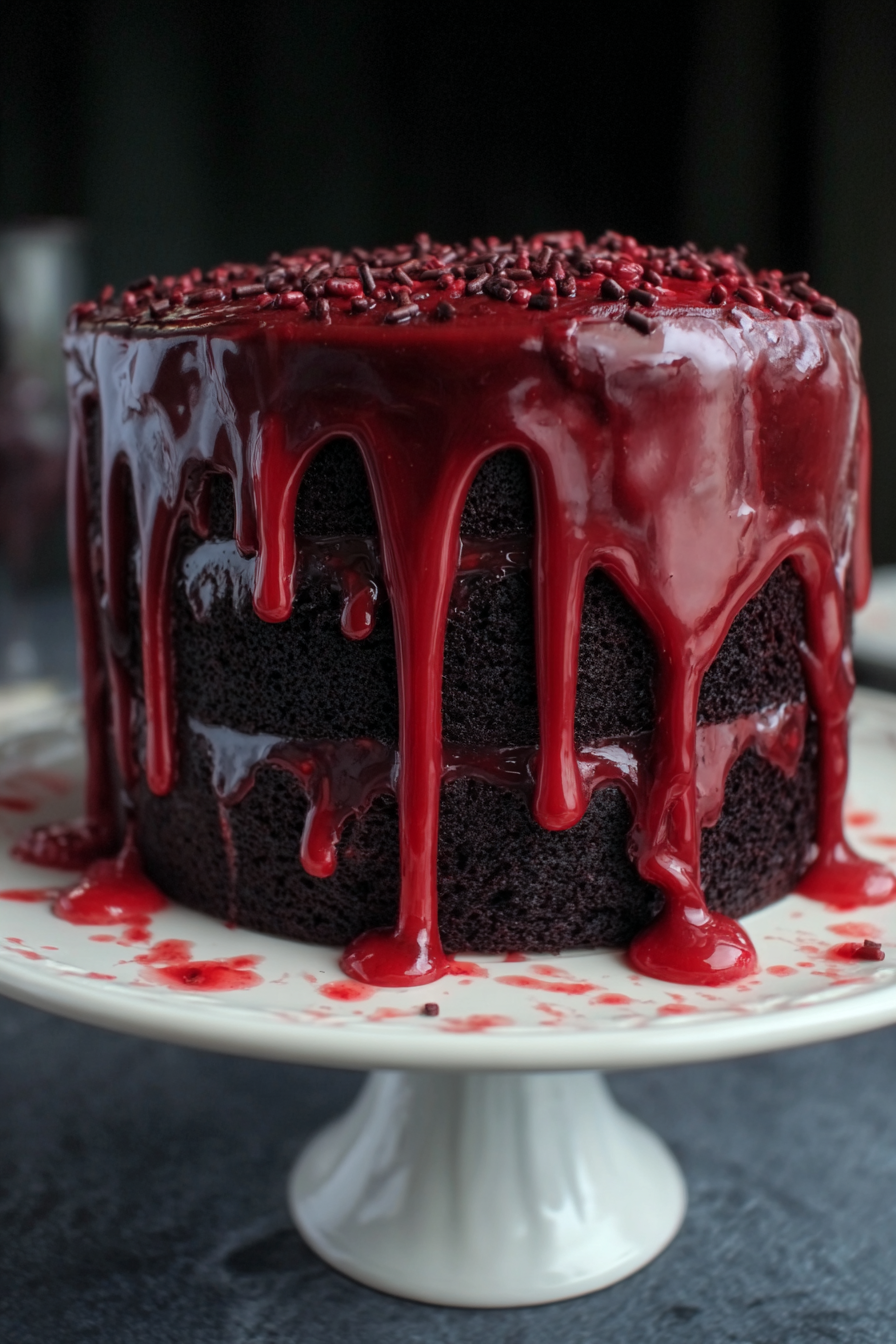
You Must Know
- The syrup drip stores well in the refrigerator for up to 3 days; rewarm gently to use again and whisk before pouring.
- This cake freezes well: wrap layers tightly and freeze up to 3 months. Thaw in the refrigerator overnight before decorating.
- High in calories and sugar per slice due to syrup and ganache; serve modest portions for balance.
- Make the ganache firmer by increasing the chocolate ratio to ensure piped decorations hold their shape at room temperature.
What I love most is how the syrup shines like glass under lights and how that dramatic visual pairs with a reliable, familiar chocolate cake. Guests often tell me the contrast between the glossy red drizzle and the dark cake makes every forkful feel like part of an event. I still recall a family Halloween where my niece declared it "the most grown-up spooky cake" and went back for seconds twice.
Storage Tips
Store the finished cake in the refrigerator covered loosely with a cake dome or a shallow box to protect the drip from contact. For short-term storage up to 48 hours refrigeration keeps the drip glossy and the ganache set. For longer storage, freeze individual slices wrapped tightly in plastic and foil to prevent freezer burn; thaw in the refrigerator overnight and bring to room temperature before serving for the best texture.
Ingredient Substitutions
If you do not have buttermilk, substitute 1 cup milk plus 1 tablespoon white vinegar or lemon juice and let it sit for five minutes. For a dairy-free version, use plant-based cream alternatives for the drip and swap the ganache for a dairy-free chocolate spread; note that the drip sheen will be slightly different. Use brewed espresso for more intense chocolate flavor or decaffeinated coffee if serving to children.
Serving Suggestions
Serve slices with lightly sweetened whipped cream, a dusting of cocoa, or a few fresh raspberries for tart contrast. For a theatrical presentation, place the cake on a dark serving platter and add a few edible silver leaf pieces or dark chocolate shards for texture. Pair with strong black coffee or a spiced red wine to complement the deep chocolate notes.
Cultural Background
Layered chocolate cakes with dramatic glazes have roots in European patisserie traditions where shiny finishes signal technical skill. The idea of a "blood" drip is a modern theatrical twist inspired by holiday and pop culture aesthetics. This recipe blends classic chocolate techniques with contemporary presentation to create something both familiar and novel.
Seasonal Adaptations
In autumn, add a pinch of cinnamon and ground cloves to the batter to introduce warm spice. For winter celebrations, tint the drip a deeper burgundy and add a dusting of edible gold. In summer, lighten the filling with a fruit curd layer between cakes to cut through the richness.
Meal Prep Tips
Bake the layers up to two days ahead and keep them wrapped in plastic at room temperature if you plan to assemble the day of. Prepare the drip and ganache in separate containers and bring to room temperature before use. Chilling briefly after crumb coating makes the final assembly faster and cleaner.
Finish by letting the cake sit 10 minutes after final chilling so the drip and ganache settle. Slice with a hot, dry knife for clean cuts and wipe the blade between slices. Share, savor, and enjoy how a simple syrup and ganache transform a beloved chocolate cake into a memorable centerpiece.
Pro Tips
Chill the stacked cake briefly before applying the drip; a slightly cold surface gives you more control over the drip flow.
Use high-quality cocoa for the best chocolate flavor; Dutch-process yields a darker, smoother flavor.
If the drip becomes too thin, refrigerate for 5 to 10 minutes to thicken slightly before pouring.
This nourishing perfect vampire blood drip cake recipe is sure to be a staple in your kitchen. Enjoy every moist, high protein slice — it is perfect for breakfast or as a wholesome snack any time.
FAQs about Recipes
Can I make the layers ahead and freeze them?
Yes. Bake the layers, wrap tightly, and freeze up to 3 months. Thaw overnight in the refrigerator before decorating.
How do I get the drip to be a deep red color?
Use gel or concentrated red food coloring for a deep color without thinning the syrup. Add a small amount at a time until you reach the desired hue.
Tags
Perfect Vampire Blood Drip Cake
This Perfect Vampire Blood Drip Cake recipe makes perfectly juicy, tender, and flavorful steak every time! Serve with potatoes and a side salad for an unforgettable dinner in under 30 minutes.
Ingredients
Cake
Blood drip
Finish
Instructions
Preheat and prepare pans
Preheat oven to 350°F. Grease and flour two 9-inch round cake pans and line bottoms with parchment. This prevents sticking and creates clean edges.
Combine dry ingredients
Whisk together flour, sugar, cocoa, baking soda, baking powder, and salt until evenly mixed and free of lumps.
Add wet ingredients
Whisk in eggs, buttermilk, coffee, vegetable oil, and vanilla until smooth, then beat briefly with an electric mixer to emulsify.
Bake the layers
Divide batter between pans and bake 30 to 35 minutes until a toothpick inserted into the center comes out clean or with a few moist crumbs.
Cool completely
Cool cakes in pans for 10 to 15 minutes, then invert onto wire racks and cool completely before stacking to prevent melting the drip.
Make the blood drip
Heat heavy cream and corn syrup until steaming, remove from heat, and add red food coloring to achieve a deep red hue. Cool to lukewarm before use.
Assemble and chill
Stack cake layers with ganache between them, chill briefly to set the crumb coat, and return to a cool surface for the drip application.
Apply drip and finish
Pour the syrup around the top edge and center, allowing natural drips down the sides, then pipe or spoon ganache decorations and chill to set.
Last Step: Please leave a rating and comment letting us know how you liked this recipe! This helps our business to thrive and continue providing free, high-quality recipes for you.
Nutrition
Did You Make This?
Leave a comment & rating below or tag
@aiolirecipe on social media!
Categories:
You might also like...

Fall Harvest Pasta Salad
A cozy, colorful salad that celebrates autumn flavors — roasted butternut squash and Brussels sprouts tossed with pasta, cranberries, pecans, and tangy feta, finished with a balsamic vinaigrette.

Cilantro Lime Steak Bowls
Bright, tangy cilantro-lime marinated flank steak served over rice with black beans, corn, fresh veggies and creamy avocado for a fast, healthy weeknight bowl.

Pecan Pie Crescent Rolls
Buttery crescent rolls filled with a sweet pecan pie–inspired filling — a quick, crowd-pleasing dessert perfect for holidays or weeknight cravings.
Did You Make This?
Leave a comment & rating below or tag @aiolirecipe on social media!
Rate This Recipe
Share This Recipe
Enjoyed this recipe? Share it with friends and family, and don't forget to leave a review!
Comments (1)
This recipe looks amazing! Can't wait to try it.
Comments are stored locally in your browser. Server comments are displayed alongside your local comments.
Hi, I'm Olivia!
What's Popular

30-Minute Meals!
Join to receive our email series which contains a round-up of some of our quick and easy family favorite recipes.