
Red Velvet Cheesecake Layer Cake

A show-stopping red velvet layer cake sandwiched with a silky baked cheesecake and finished with cream cheese frosting and a red berry glaze.
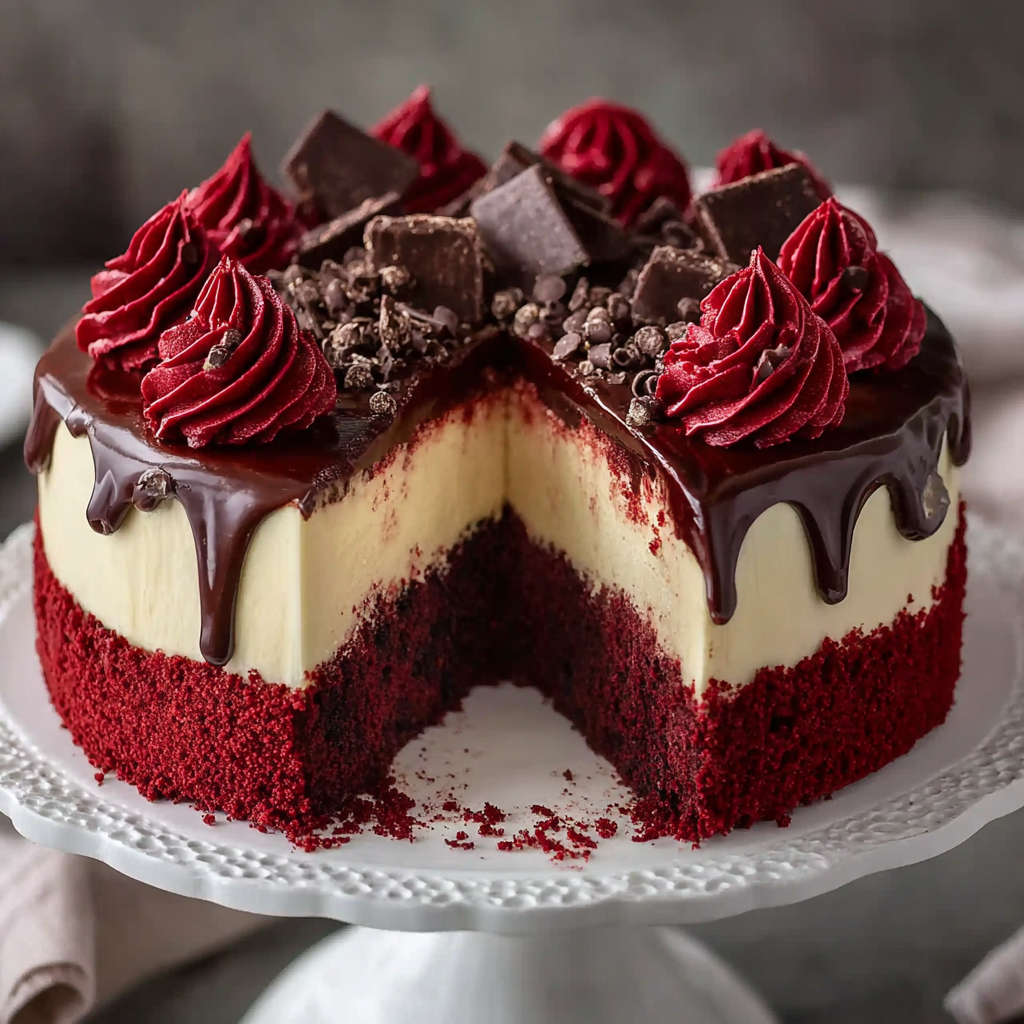
This Red Velvet Cheesecake Layer Cake is one of those celebratory bakes that changed how I think about special-occasion desserts. I first made it for a milestone birthday when I wanted something dramatic yet comforting: a tender, cocoa-tinged red velvet sponge layered with a rich, tangy baked cheesecake and topped with lush cream cheese frosting and a bright berry glaze. The contrast between the slightly crisp chocolate cookie crust, the velvety cheesecake, and the moist cake layers is what makes each bite sing.
I discovered this combination during a long afternoon of testing textures and balances. I had always loved red velvet for its subtle cocoa and tang from buttermilk, and pairing it with a baked cheesecake struck me as an elegant and surprisingly harmonious match. Family and friends immediately requested it for holidays, anniversaries, and any time we wanted both comfort and showmanship. It slices cleanly, looks stunning on the table, and keeps well refrigerated for several days, which makes it reliably practical as well as beautiful.
Why You'll Love This Recipe
- This layered dessert combines three sensibilities in one: a crisp chocolate cookie base option for texture, a dense baked cheesecake for luxurious creaminess, and tender red velvet layers that stay moist even a day after baking.
- It uses pantry-friendly ingredients like all-purpose flour, sugar, cream cheese, and common dairy items, so you rarely need special shopping runs.
- Make-ahead friendly: the cheesecake can be prepared and chilled a day in advance, and the cake layers keep well wrapped for a day before assembly.
- Visually striking: the deep red layers and glossy berry glaze make it ideal for celebrations, and you can dress it up with piped frosting and chocolate bits in minutes.
- Time-efficient process: active prep time is reasonable because many steps overlap while things bake or chill, and the frosting is straightforward to whip together in a stand mixer or by hand.
- Flexible: optional cookie crust adds a textural contrast and is easy to skip or swap for a graham base depending on preference.
In my first holiday test, plating this cake made guests pause and smile before anyone even tasted it. The cheesecake layer unexpectedly became the star; its tang balances the sweet frosting and the cocoa notes in the red velvet. My cousin commented that it tasted like a dessert version of velvet and cream, and that image stuck with me ever since.
Ingredients
- Chocolate cookie crumbs: 2 cups chocolate cookie crumbs (about 14 oz) mixed with 1/2 cup melted unsalted butter to form a pressable crust that adds crunch and a chocolate counterpoint to the cheesecake.
- All-purpose flour: 2 1/2 cups sifted to prevent lumps and keep the red velvet layers tender; spoon into measuring cups for accuracy and avoid packing.
- Sugar: 1 1/2 cups granulated sugar for the layers and additional for the cheesecake; proper creaming and dissolving maintain moistness.
- Buttermilk: 1 1/2 cups buttermilk (or milk plus 1 tbsp vinegar) provides acidity to react with baking soda and keep crumb fine and tender.
- Vegetable oil: 1 cup oil keeps the cake exceptionally moist and better-stored than butter-based versions; neutral oil like canola is best.
- Cocoa powder: 2 tablespoons unsweetened cocoa to deepen flavor without overpowering the red color.
- Cream cheese for cheesecake: 16 oz cream cheese softened to room temperature so the cheesecake is smooth and lump-free.
- Cream cheese for frosting: 16 oz cream cheese plus 1 cup (2 sticks) unsalted butter softened to pipe a stable, silky frosting.
- Eggs: Multiple large eggs for structure in both cake and cheesecake layers; bring them to room temperature so they incorporate evenly.
- Red gel food coloring: 1 to 2 tablespoons for vivid color without extra liquid; gel pigments give consistent hue.
Instructions
Prepare the cookie crust (optional):Preheat oven to 350°F. Combine 2 cups chocolate cookie crumbs with 1/2 cup melted unsalted butter until the texture resembles damp sand. Press firmly into the bottom of a 9-inch springform pan. Bake for 10 minutes and cool completely before adding the cheesecake batter so the crust sets and does not become soggy.Make the red velvet batter:Preheat oven to 350°F and prepare two 9-inch round pans by greasing and lining with parchment. Whisk together 2 1/2 cups all-purpose flour, 2 tablespoons unsweetened cocoa, 1 teaspoon baking soda, 1 teaspoon baking powder, and 1 teaspoon salt. In a separate bowl, whisk 1 1/2 cups sugar with 1 cup vegetable oil, 2 large eggs, 1 1/2 cups buttermilk, 1 teaspoon white vinegar, 2 teaspoons vanilla extract, and 1–2 tablespoons red gel food coloring until homogenous. Fold wet into dry until just combined to avoid gluten development. Divide between pans and bake 25–30 minutes until a toothpick comes out with a few moist crumbs. Cool completely on wire racks to prevent cracking when assembling.Bake the cheesecake layer:Reduce oven to 325°F. Beat 16 oz softened cream cheese with 1/2 cup sugar until smooth. Add 2 large eggs one at a time, mixing well after each addition. Stir in 1 teaspoon vanilla and 1/2 cup sour cream until smooth and glossy. Pour over the cooled cookie crust or into a greased 9-inch pan if skipping crust. Bake 40–45 minutes until edges are set and center remains slightly jiggly. Cool fully at room temperature, then chill at least 4 hours or overnight for best texture and easier slicing.Make the cream cheese frosting:Beat 16 oz cream cheese with 1 cup unsalted butter until completely smooth. On low speed, gradually add 4 cups powdered sugar until combined, then beat in 2 teaspoons vanilla. Keep chilled briefly if the frosting becomes too soft before assembling.Assemble the layers:Place one red velvet layer on the serving plate and spread a thin crumb coat of frosting to anchor the cheesecake. Carefully position the chilled cheesecake layer on top and spread a thin frosting layer to help the top cake adhere. Add the second red velvet layer, then apply a full coat of frosting to the top and sides. Use a bench scraper for a smooth finish or a spatula for a more rustic look.Finish with glaze and decoration:Warm 1/2 cup strawberry or raspberry jam with 2 tablespoons water and 1 teaspoon lemon juice over low heat until pourable. Allow to cool slightly, then spoon or pour onto the center, letting it drip naturally down the sides. Pipe extra frosting, press red velvet crumbs into the sides or top, and scatter dark chocolate chips for contrast. Chill briefly to set piping before serving.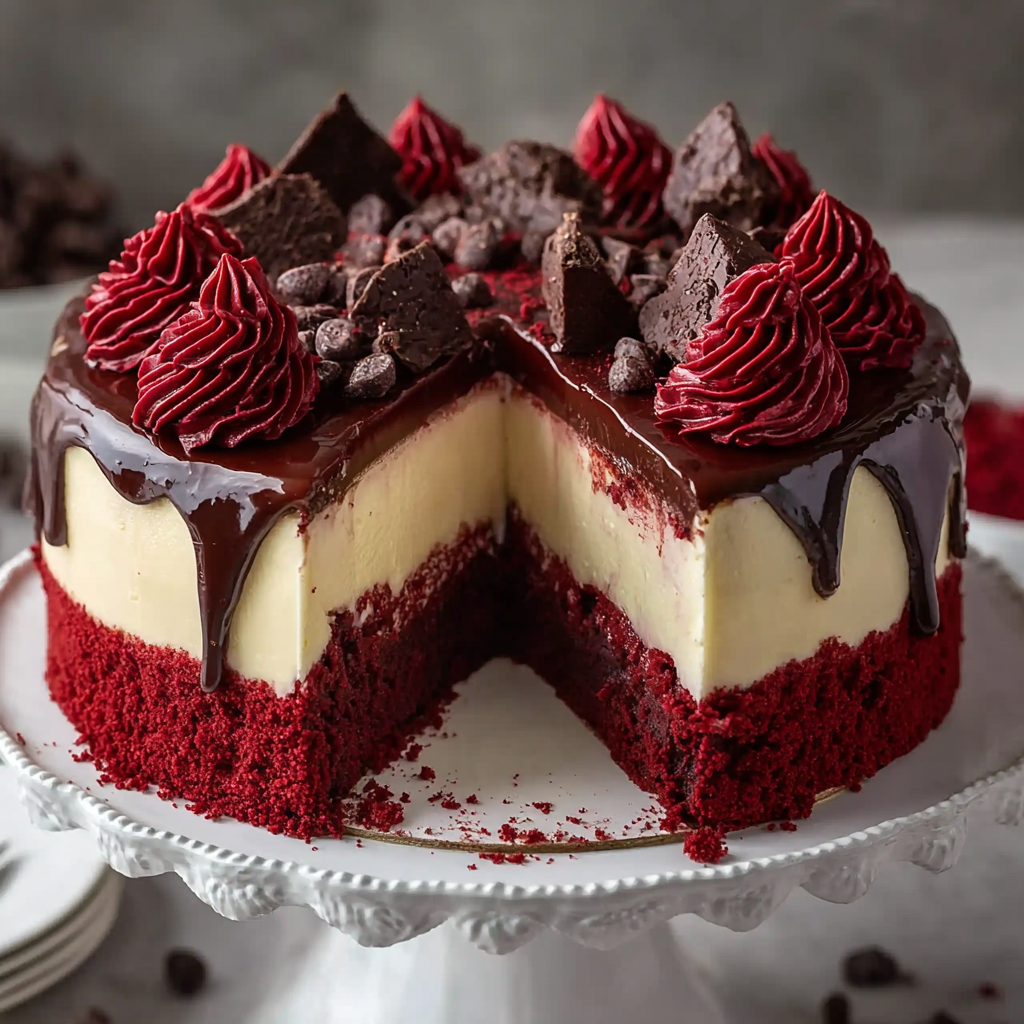
You Must Know
- Chilling is essential: the cheesecake must be fully chilled before stacking to avoid sliding or breaking the sponge during assembly.
- Room temperature ingredients mix more evenly: soften cream cheese and butter, and bring eggs and buttermilk to near room temperature for smooth batters.
- This dessert keeps well refrigerated for up to 4 days; wrap slices airtight to prevent the cake from drying and to maintain creaminess.
- Freezing option: slices freeze well for up to 3 months wrapped tightly; thaw overnight in the refrigerator before serving.
My favorite aspect is the balance of textures and flavors: the slightly tangy cheesecake layer cuts through the richness of the frosting and the sweetness of the glaze. Once, I transported this cake to a summer wedding and the glaze stayed glossy even after a long drive — the visual payoff and the confident slices made everyone ask for the recipe.
Storage Tips
Store the finished layer cake in the refrigerator, loosely covered with a cake dome or plastic wrap, for up to 4 days. For best texture, avoid airtight sealing that can crush piped decorations; instead, tent plastic over a cake stand. To freeze, slice the cake into portions, flash-freeze on a tray for 1 hour, then wrap each piece in plastic wrap and foil. Thaw in the refrigerator overnight; if piping looks slightly soft after thawing, chill 1–2 hours before serving. When reheating, never microwave whole slices; allow them to warm to near refrigerator temperature so the frosting softens slightly for perfect serving texture.
Ingredient Substitutions
If you need a dairy-free version, use a nondairy cream cheese and butter substitute along with a thick coconut cream in place of sour cream; note the flavor will shift and the cheesecake texture can be slightly less dense. To reduce sugar, try a powdered sugar alternative in the frosting and cut the batter sugar by up to 25 percent, but expect a slightly drier crumb. For a gluten-free option, substitute a cup-for-cup gluten-free flour blend and add 1/2 teaspoon xanthan gum for structure; baking times may vary by a few minutes, so test with a toothpick. You can also swap the cookie crust for a graham cracker crust if you prefer a milder base.

Serving Suggestions
Serve slices slightly chilled for clean edges and the best textural contrast. Garnish with a dollop of whipped cream, a few fresh berries, and a sprinkle of finely chopped dark chocolate to play up the glaze and crumbs. For a party, present the cake on a raised stand with a cake knife warmed in hot water to make slicing effortless. Pair with strong coffee or a milk-based drink to cut through the richness, or offer a tart fruit compote on the side for guests who prefer less sweet bites.
Cultural Background
Red velvet is a modern American classic that evolved from traditional red cakes dating back to the early 20th century, gaining renewed popularity through iconic bakeries and Southern baking traditions. The color and subtle cocoa flavor became emblematic in celebratory baking, while cream cheese frostings were common in American home baking. Marrying red velvet to a baked cheesecake is a contemporary twist that leans on American layered cakes and cheesecake traditions, creating a hybrid that celebrates both texture and visual drama.
Seasonal Adaptations
For winter celebrations, use a spiced berry glaze with a pinch of cinnamon and clove for warmth. In spring or summer, fresh macerated raspberries mixed into a light glaze brighten the top. Holiday versions can include crushed peppermint sprinkled over the frosting or a drizzle of warm salted caramel for contrast. Swap the berry jam for cherry preserves and a splash of kirsch for an adult twist.
Meal Prep Tips
Plan ahead: bake the cheesecake and chill it a day before assembly, and bake the cake layers either the same day or the day prior. Store layers wrapped in plastic wrap at room temperature for one day or refrigerate for longer. Make the frosting the morning of assembly for best piping performance, and keep it chilled until needed. When transporting, keep the cake chilled in a secure cake carrier and place non-slip matting underneath to prevent shifting.
There is something quietly celebratory about this layered dessert: it rewards the baker with applause and the guests with unforgettable slices. Make it for a special occasion, and consider it your new signature — the combination of velvet, cream cheese, and glossy berry is hard to forget.
Pro Tips
Soften cream cheese and butter at room temperature for at least 30 minutes to ensure a lump-free frosting.
Use gel coloring rather than liquid to achieve vivid red without altering batter consistency.
Chill the cheesecake fully before stacking to prevent seams and sliding during assembly.
Measure flour by spooning into the cup and leveling to avoid dense cake layers.
This nourishing red velvet cheesecake layer cake recipe is sure to be a staple in your kitchen. Enjoy every moist, high protein slice — it is perfect for breakfast or as a wholesome snack any time.
FAQs about Recipes
Can I assemble the cake the same day as baking the cheesecake?
Yes. The cheesecake should be fully chilled before stacking to prevent sliding; chill at least 4 hours or overnight for best firmness.
How do I make the red berry glaze pourable without thinning the frosting?
Yes. Thinly warm jam with a tablespoon of water until pourable. Cool slightly before pouring so it does not melt the frosting.
Tags
Red Velvet Cheesecake Layer Cake
This Red Velvet Cheesecake Layer Cake recipe makes perfectly juicy, tender, and flavorful steak every time! Serve with potatoes and a side salad for an unforgettable dinner in under 30 minutes.
Ingredients
Chocolate Cookie Crust (optional)
Red Velvet Cake Layers
Cheesecake Layer
Cream Cheese Frosting
Red Berry Glaze & Decoration
Instructions
Prepare the cookie crust (optional)
Combine cookie crumbs and melted butter, press into a 9-inch springform pan, bake at 350°F for 10 minutes, cool completely.
Bake the red velvet layers
Whisk dry ingredients. Mix wet ingredients separately. Combine until just smooth. Divide between two 9-inch pans and bake at 350°F for 25–30 minutes. Cool completely.
Make the cheesecake layer
Beat cream cheese and sugar until smooth, add eggs one at a time, stir in vanilla and sour cream. Pour over cooled crust and bake at 325°F for 40–45 minutes. Chill thoroughly.
Prepare the frosting
Beat cream cheese and butter until smooth. Gradually add powdered sugar, then vanilla. Chill if necessary to firm before frosting the cake.
Assemble and decorate
Stack a cake layer, frost thinly, add cheesecake, frost, top with the second layer, coat the cake, add berry glaze, pipe frosting, and scatter crumbs and chocolate.
Last Step: Please leave a rating and comment letting us know how you liked this recipe! This helps our business to thrive and continue providing free, high-quality recipes for you.
Nutrition
Did You Make This?
Leave a comment & rating below or tag
@aiolirecipe on social media!
Categories:
You might also like...

Fall Harvest Pasta Salad
A cozy, colorful salad that celebrates autumn flavors — roasted butternut squash and Brussels sprouts tossed with pasta, cranberries, pecans, and tangy feta, finished with a balsamic vinaigrette.

Cilantro Lime Steak Bowls
Bright, tangy cilantro-lime marinated flank steak served over rice with black beans, corn, fresh veggies and creamy avocado for a fast, healthy weeknight bowl.

Pecan Pie Crescent Rolls
Buttery crescent rolls filled with a sweet pecan pie–inspired filling — a quick, crowd-pleasing dessert perfect for holidays or weeknight cravings.
Did You Make This?
Leave a comment & rating below or tag @aiolirecipe on social media!
Rate This Recipe
Share This Recipe
Enjoyed this recipe? Share it with friends and family, and don't forget to leave a review!
Comments (1)
This recipe looks amazing! Can't wait to try it.
Comments are stored locally in your browser. Server comments are displayed alongside your local comments.
Hi, I'm Olivia!
What's Popular

30-Minute Meals!
Join to receive our email series which contains a round-up of some of our quick and easy family favorite recipes.