
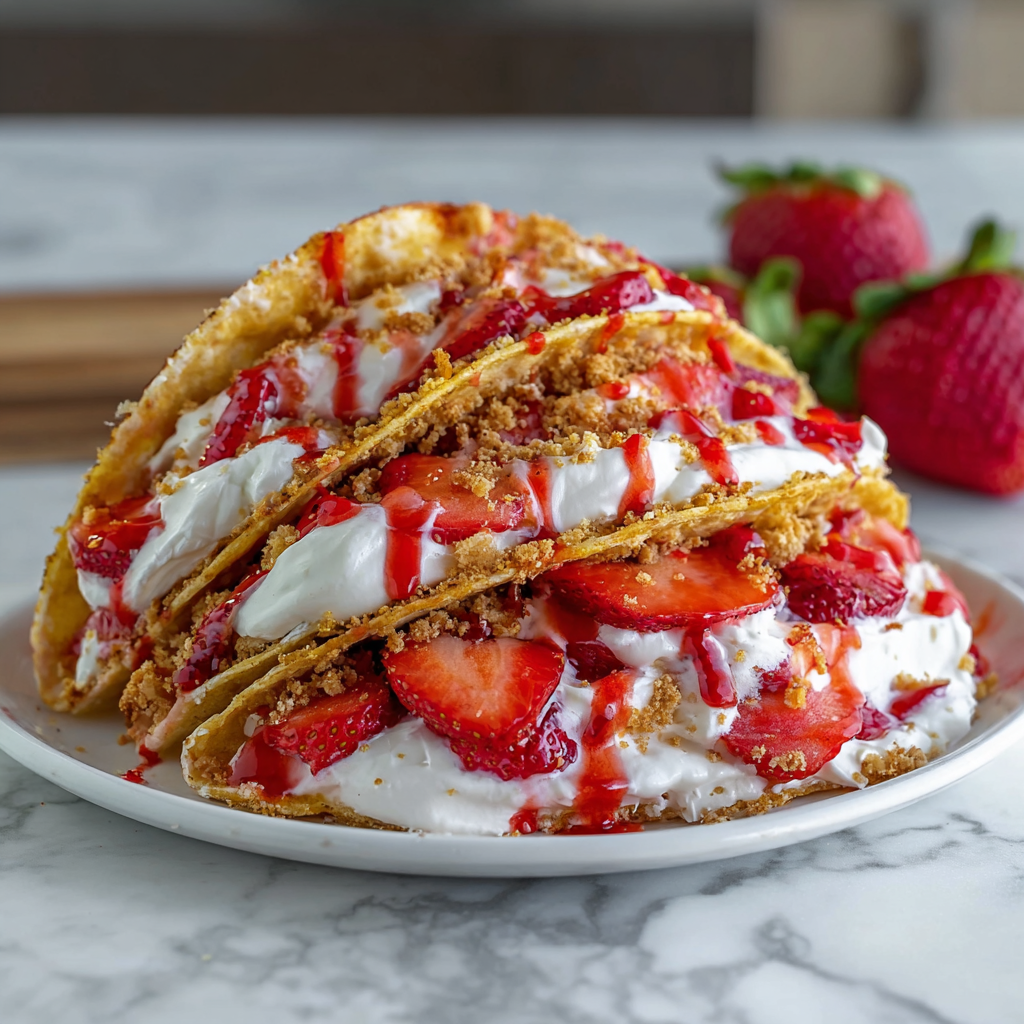
Strawberry Crunch Cheesecake Tacos

Sweet, crunchy mini taco shells filled with silky cheesecake cream, fresh strawberries, and a crunchy granola finish—an easy, make-ahead dessert everyone will love.
Why You'll Love This Recipe
- Handheld and elegant: serve individually without slicing a large cake—perfect for parties and brunches.
- Quick to assemble: from crushed crumbs to finished tacos in about 30 minutes active time; bake or no-bake options suit your schedule.
- Uses pantry staples: graham crumbs, cream cheese, powdered sugar, and frozen or fresh strawberries keep this accessible.
- Customizable texture: bake shells for crispness or chill for a softer, cookie-like shell—both delicious.
- Kid-friendly and Instagram-ready: bright red berries and a drizzle of sauce make these look like a professional dessert.
- Make-ahead friendly: filling can be prepared a day ahead and piped when guests arrive.
I remember the first time guests asked for seconds—the looks on their faces when the crunchy shell met the cool filling were priceless. It’s become my go-to when I want something pretty and simple; the kids love decorating their tacos and adults appreciate the balance of sweet and tart.
Ingredients
- Crunchy taco shells: 1 1/2 cups crushed graham crackers (about 6 ounces) mixed with 1/4 cup melted unsalted butter or coconut oil and 2 tablespoons chopped almonds or pecans. Look for plain graham crackers or digestive biscuits for a neutral sweetness; finely crush for even texture and easier shaping.
- Cheesecake filling: 8 ounces cream cheese at room temperature, 1/3 cup powdered sugar, 1 teaspoon vanilla extract, and 1 cup whipped cream (or chilled coconut cream for dairy-free). The cream cheese should be softened so it beats smooth without lumps.
- Add-ins: 1/2 cup diced fresh strawberries folded into the filling to distribute bursts of fruit and a pleasant pink fleck throughout the cream.
- Topping & garnish: 1/4 cup granola or toasted oats for crunch, 2 to 3 tablespoons strawberry sauce or jam for gloss and extra strawberry flavor, plus fresh sliced strawberries for finish and color.
Instructions
Make the shells: Mix the crushed graham crackers with the melted butter or coconut oil and the chopped nuts until the crumbs hold together when pressed. Press the mixture into taco molds, small muffin tins, or the back of a spoon against the sides of small oven-safe cups to shape. For baked shells, arrange on a baking sheet and bake at 350°F for 7 to 9 minutes until set and fragrant; they will firm up as they cool. For a no-bake option, press into molds and chill in the freezer for 30 to 40 minutes until firm. Allow cooled shells to rest at room temperature briefly to avoid condensation when filling. Prepare the filling: Using a hand mixer or stand mixer fitted with a paddle, beat the room-temperature cream cheese until completely smooth, about 1 to 2 minutes. Add the powdered sugar and vanilla and beat until incorporated. In a separate bowl, whip the cream to soft peaks, then gently fold the whipped cream into the sweetened cream cheese until light and airy—avoid overmixing so the filling stays fluffy. Fold in the diced strawberries with a rubber spatula for even distribution. Chill for texture (optional): If you prefer a firmer filling that pipes cleanly, cover and refrigerate the filling for 20 to 30 minutes. Chilling makes the filling easier to pipe into shells and creates a neater presentation while keeping the texture creamy without collapsing. Assemble the tacos: Fill a piping bag or large resealable bag fitted with a corner snip and pipe the cheesecake filling into each cooled shell, or spoon it in carefully to avoid cracking delicate shells. Sprinkle a small handful of granola or toasted oats on top for extra crunch. Drizzle 1/2 teaspoon of strawberry sauce or jam over each taco, using back-and-forth motions for a decorative effect. Garnish and serve: Top with fresh sliced strawberries and a final pinch of chopped nuts if desired. Serve immediately for maximum crunch, or chill for 20 to 30 minutes for a slightly firmer texture and a cleaner slice when biting. If chilled, allow the tacos to sit 5 minutes at room temperature before serving to soften slightly.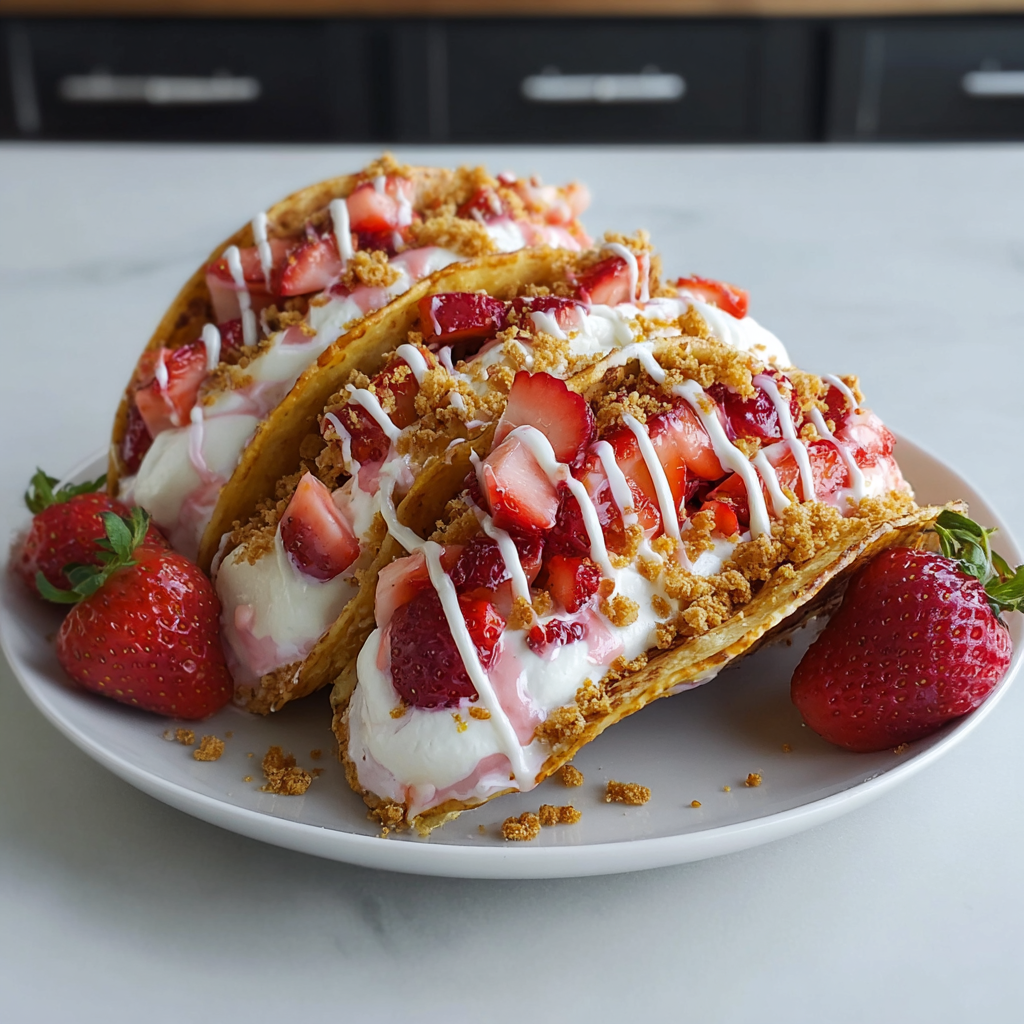
You Must Know
- Short-term storage: assembled tacos stay best in the refrigerator up to 24 hours; longer storage softens shells as moisture migrates from filling to crust.
- Freezing: freeze only the unfilled cooled shells for up to 3 months; thaw in the refrigerator before filling to keep texture.
- Make-ahead: prepare the filling up to 24 hours ahead and keep covered; pipe into shells right before serving for freshest crunch.
- Allergen notes: this recipe uses nuts in the shell and dairy in the filling—easy swaps exist to accommodate allergies.
My favorite part of these tacos is the timing: serve them right after assembly while the shell is crisp and the filling is cool but not rock-hard. Over the years I’ve learned that a gentle hand when filling avoids breaking shells, and piping creates a prettier edge than spooning. Guests often comment on the surprising combination of a taco form with classic cheesecake flavor, and it’s become a signature for summer gatherings.

Storage Tips
Store assembled tacos in a single layer in an airtight container in the refrigerator for up to 24 hours. For longer storage, keep the shells and filling separate: shells freeze well when wrapped tightly for up to 3 months, and the filling keeps in the fridge for 24 to 48 hours. When reheating the filling from the fridge, let it sit at room temperature for 10 minutes and briefly re-whip if it has separated. Always keep fresh sliced strawberries chilled until just before serving to avoid premature juices softening the shells.
Ingredient Substitutions
For dairy-free versions, use full-fat coconut cream whipped to soft peaks in place of heavy cream and a dairy-free cream cheese alternative for the base. Swap almonds or pecans with sunflower seeds or omit nuts entirely to make the shells nut-free; add 1 tablespoon extra melted butter or oil to help bind crumbs if you omit nuts. Use gluten-free graham-style crackers to make the shells gluten-free—press firmly and bake a touch longer for crispness. Reduce sugar slightly if your berries are especially sweet.
Serving Suggestions
Present these on a long platter with microgreens or mint sprigs scattered for contrast, and serve alongside a small bowl of extra strawberry sauce for drizzling. Pair with a bright beverage—like iced lemon verbena tea or a sparkling rosé—for celebration-worthy simplicity. For brunch, offer alongside yogurt parfaits and citrus fruit; for dessert buffets, place small tongs so guests can pick up tacos without crushing them. Garnish options include a dusting of powdered sugar or a few edible flowers for a festive touch.
Seasonal Adaptations
In summer, maximize flavor by using peak-ripe berries and a spoonful of macerated strawberries in the filling. In spring, add a touch of lemon zest for brightness; in fall, swap the strawberries for roasted stone fruits and sprinkle pumpkin seeds over the top. Holiday versions work well with a cranberry-orange jam and a sprinkling of toasted hazelnuts. The shell can also accommodate fall spices—add 1/4 teaspoon ground cinnamon and a pinch of nutmeg when mixing crumbs.
Meal Prep Tips
Plan assembly by making shells and filling the day before a party: store cooled shells in a single layer wrapped tightly, and refrigerate the filling in an airtight bowl. On the day, dice strawberries and prepare garnishes, then pipe the filling into shells 30 minutes before guests arrive so the filling settles but shells remain crisp. Use a heavy-duty piping bag or a zip-top bag with the corner snipped for neat, even portions. Label containers with prep times to avoid food-safety issues when serving to guests.
These tacos bring together simplicity and a playful twist on a classic—crispy, creamy, and undeniably shareable. Make them your own by experimenting with fillings and toppings, and enjoy watching people’s surprise when they bite into a tiny cheesecake taco.
Pro Tips
Press crumbs firmly into the mold to avoid cracks when filling.
Chill the filling for 20 minutes if you plan to pipe it for a neater presentation.
Keep sliced strawberries chilled until just before serving to avoid soggy shells.
This nourishing strawberry crunch cheesecake tacos recipe is sure to be a staple in your kitchen. Enjoy every moist, high protein slice — it is perfect for breakfast or as a wholesome snack any time.
FAQs about Recipes
Can I make the shells ahead of time?
Yes—if you want crisp shells, bake them as directed and fill just before serving. For a softer shell, use the freezer method and chill before filling.
How do I make these dairy-free?
Use full-fat coconut cream that has been chilled and whipped to soft peaks. Use a dairy-free cream cheese substitute for the base.
Tags
Strawberry Crunch Cheesecake Tacos
This Strawberry Crunch Cheesecake Tacos recipe makes perfectly juicy, tender, and flavorful steak every time! Serve with potatoes and a side salad for an unforgettable dinner in under 30 minutes.
Ingredients
Crunchy taco shells
Cheesecake filling
Topping & garnish
Instructions
Make the shells
Combine crushed graham crackers with melted butter or coconut oil and chopped nuts. Press into taco molds or small cups, then bake at 350°F for 7 to 9 minutes until set, or freeze for 30 to 40 minutes for a no-bake option. Allow to cool completely before filling.
Prepare the filling
Beat softened cream cheese until smooth. Add powdered sugar and vanilla and beat until combined. Whip cream to soft peaks and fold gently into the cream cheese mixture. Fold in diced strawberries to distribute evenly.
Chill filling (optional)
Cover and refrigerate the filling for 20 to 30 minutes if you want a firmer texture that pipes neatly into shells.
Assemble tacos
Pipe or spoon the cheesecake filling into cooled shells. Sprinkle granola or toasted oats on top and drizzle with strawberry sauce or jam for a glossy finish.
Garnish and serve
Top each taco with fresh sliced strawberries and serve immediately for maximum crunch or chill for 20 to 30 minutes for a firmer texture.
Last Step: Please leave a rating and comment letting us know how you liked this recipe! This helps our business to thrive and continue providing free, high-quality recipes for you.
Nutrition
Did You Make This?
Leave a comment & rating below or tag
@aiolirecipe on social media!
Categories:
You might also like...

Fall Harvest Pasta Salad
A cozy, colorful salad that celebrates autumn flavors — roasted butternut squash and Brussels sprouts tossed with pasta, cranberries, pecans, and tangy feta, finished with a balsamic vinaigrette.

Cilantro Lime Steak Bowls
Bright, tangy cilantro-lime marinated flank steak served over rice with black beans, corn, fresh veggies and creamy avocado for a fast, healthy weeknight bowl.

Pecan Pie Crescent Rolls
Buttery crescent rolls filled with a sweet pecan pie–inspired filling — a quick, crowd-pleasing dessert perfect for holidays or weeknight cravings.
Did You Make This?
Leave a comment & rating below or tag @aiolirecipe on social media!
Rate This Recipe
Share This Recipe
Enjoyed this recipe? Share it with friends and family, and don't forget to leave a review!
Comments (1)
This recipe looks amazing! Can't wait to try it.
Comments are stored locally in your browser. Server comments are displayed alongside your local comments.
Hi, I'm Olivia!
What's Popular

30-Minute Meals!
Join to receive our email series which contains a round-up of some of our quick and easy family favorite recipes.